The game is set in the sky on the German side of the lines near Baupaume where 24 Squadron tangles with Jasta 2 on a regular basis. The action is based on a real event. The names have been changed to protect the innocent. As this is played solo, a rudimentary AI (ie: roll a d6!) was used to guide the action when “What would the pilot do here?” questions arose during the course of the game.
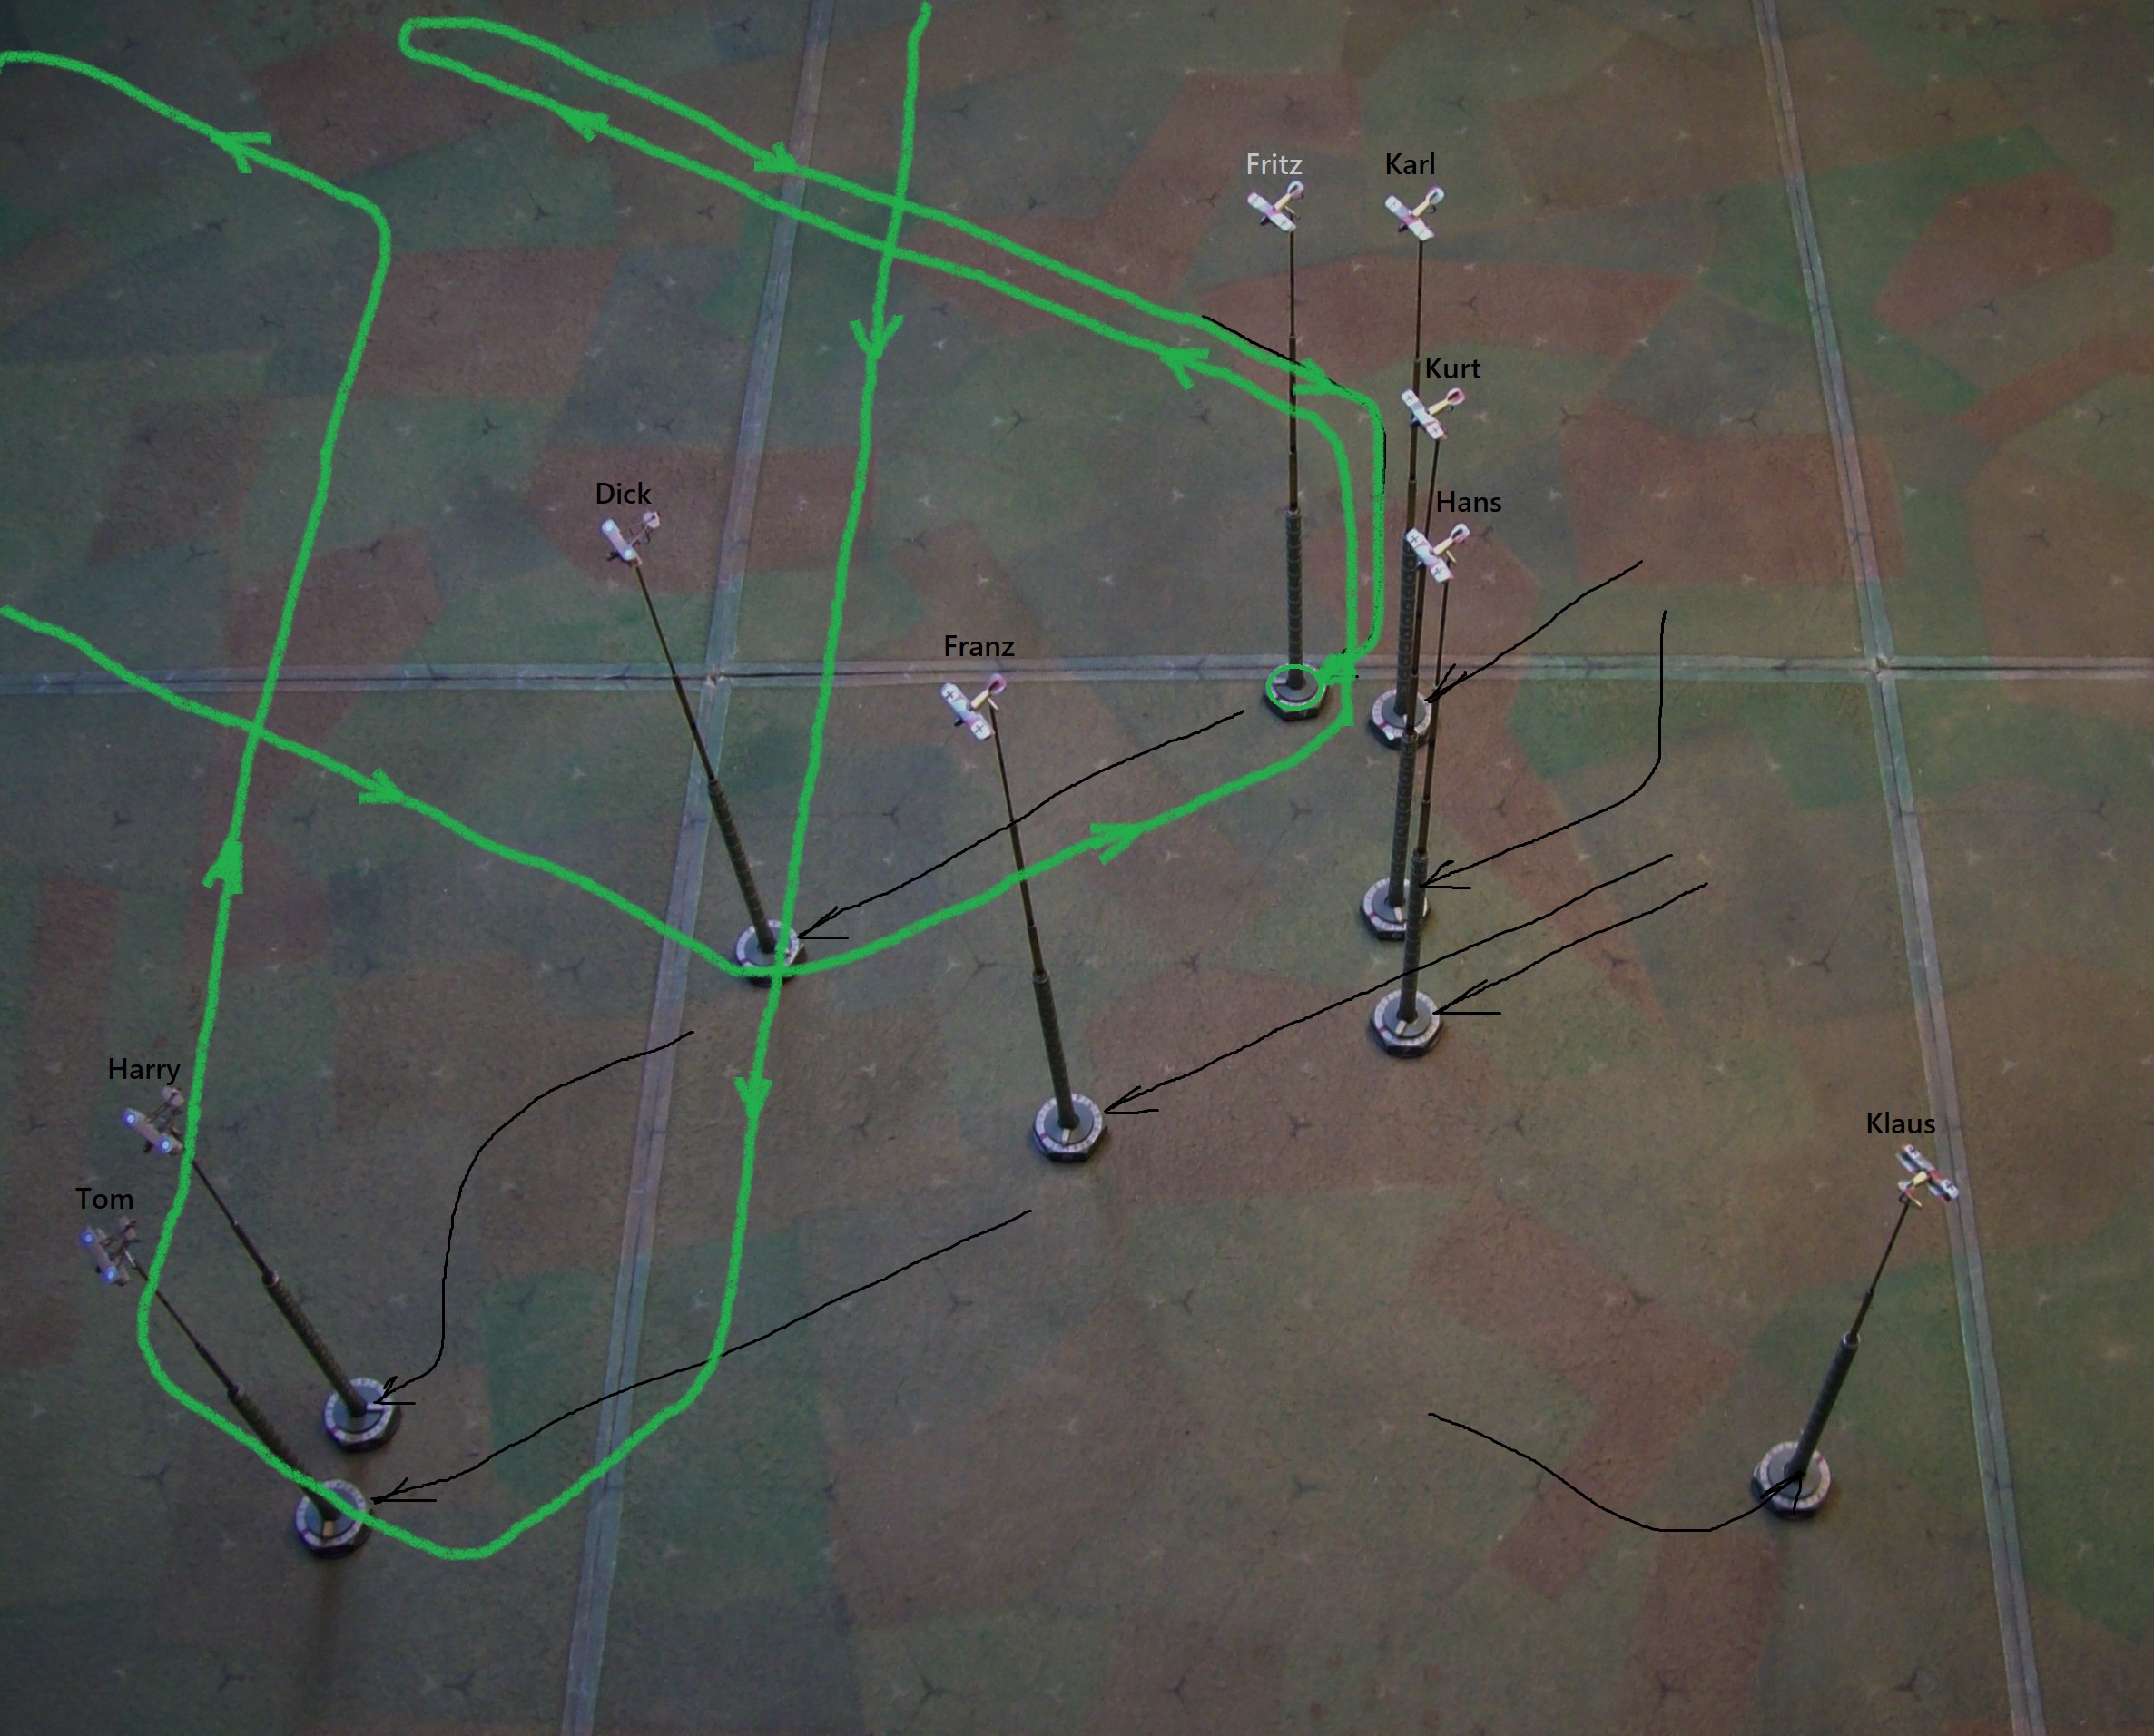
The rules used are my unborn homebrew set. The miniatures are 1/300 H&R. The table is marked with two sets of hexes – black and white: apologies for the difficulty in making them out in the poor photos. This game uses the black set to indicate the ‘engagement areas’ (~600′) within which the models are placed to show their general locations – when the black scribbles that show the movements each turn are drawn as a circle it represents an aircraft maneuvering within that particular area as opposed to moving between them. While a degree of staging has been done to create sensible visuals, it needs to be remembered that the rules do not attempt to represent the exact location of the aircraft at any particular moment, and there are a few ‘open seas’ shifts of the models to keep the action from falling off the edge. It should also be noted / stressed that the main purpose of this AAR is not to present much (if anything) in the way of pretty, but to highlight the type of game the rules produce where the combatants jockey across miles of sky.
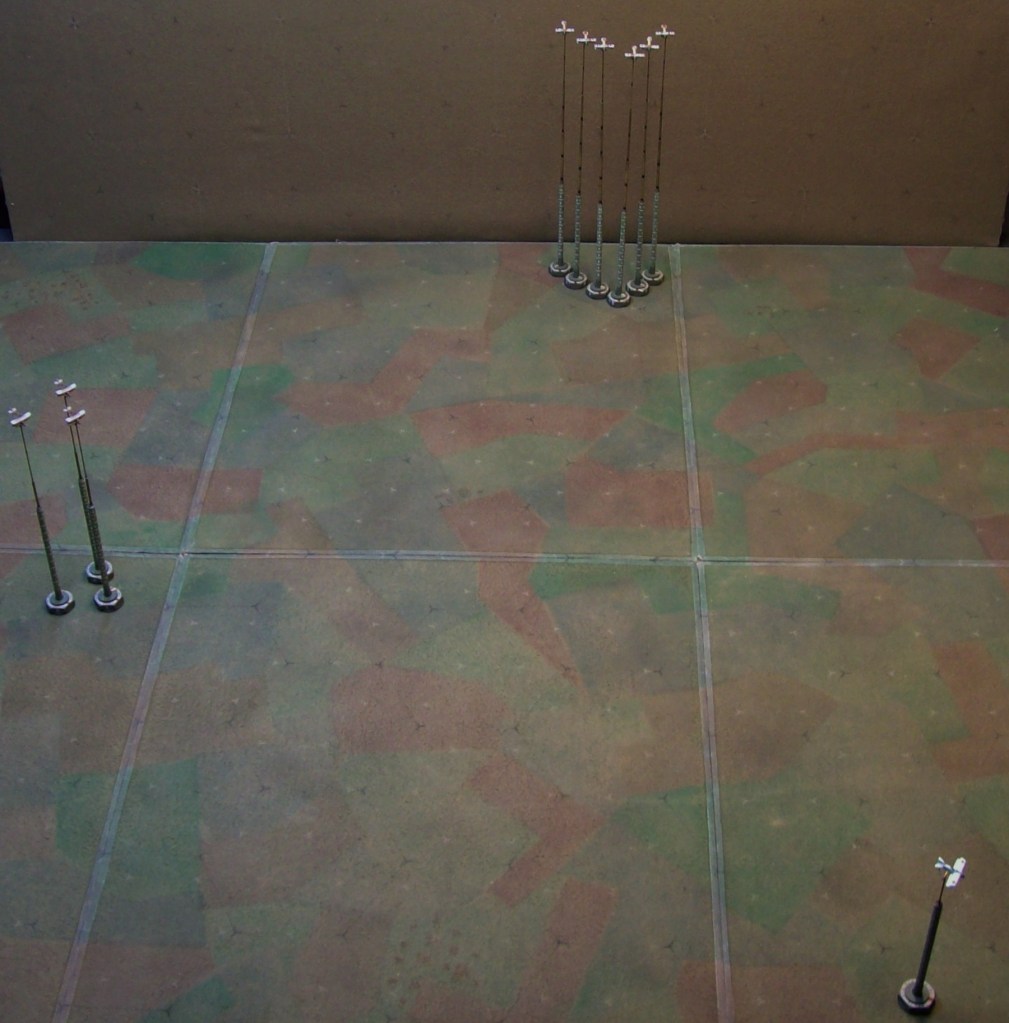
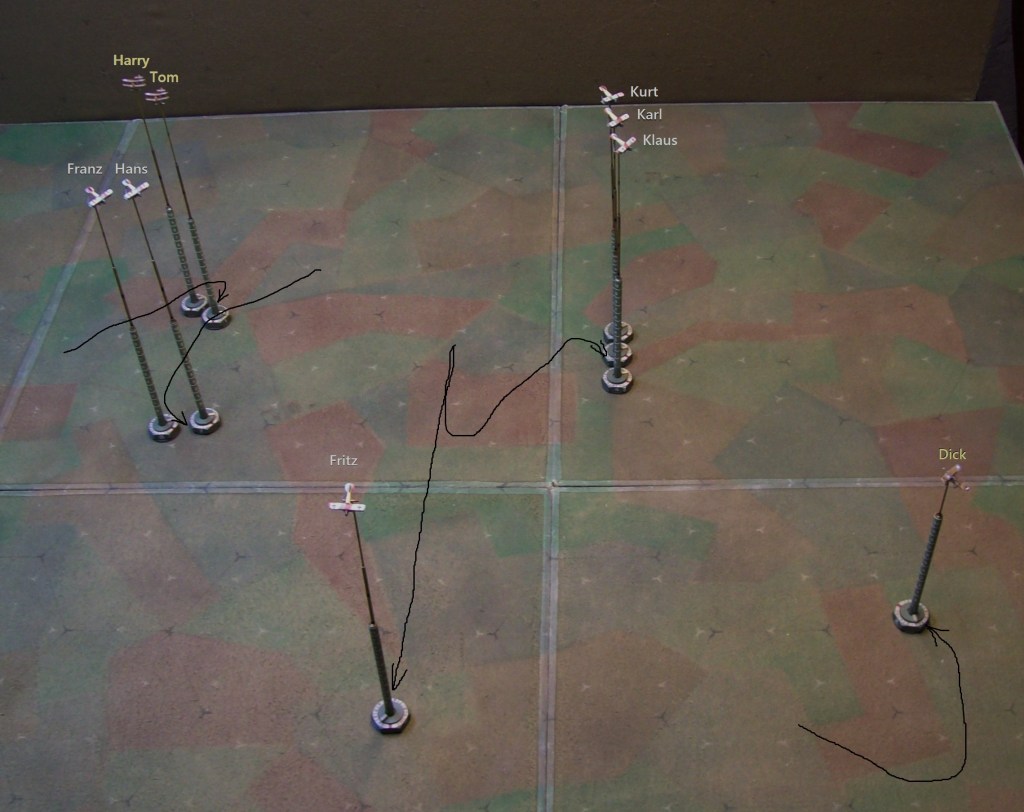
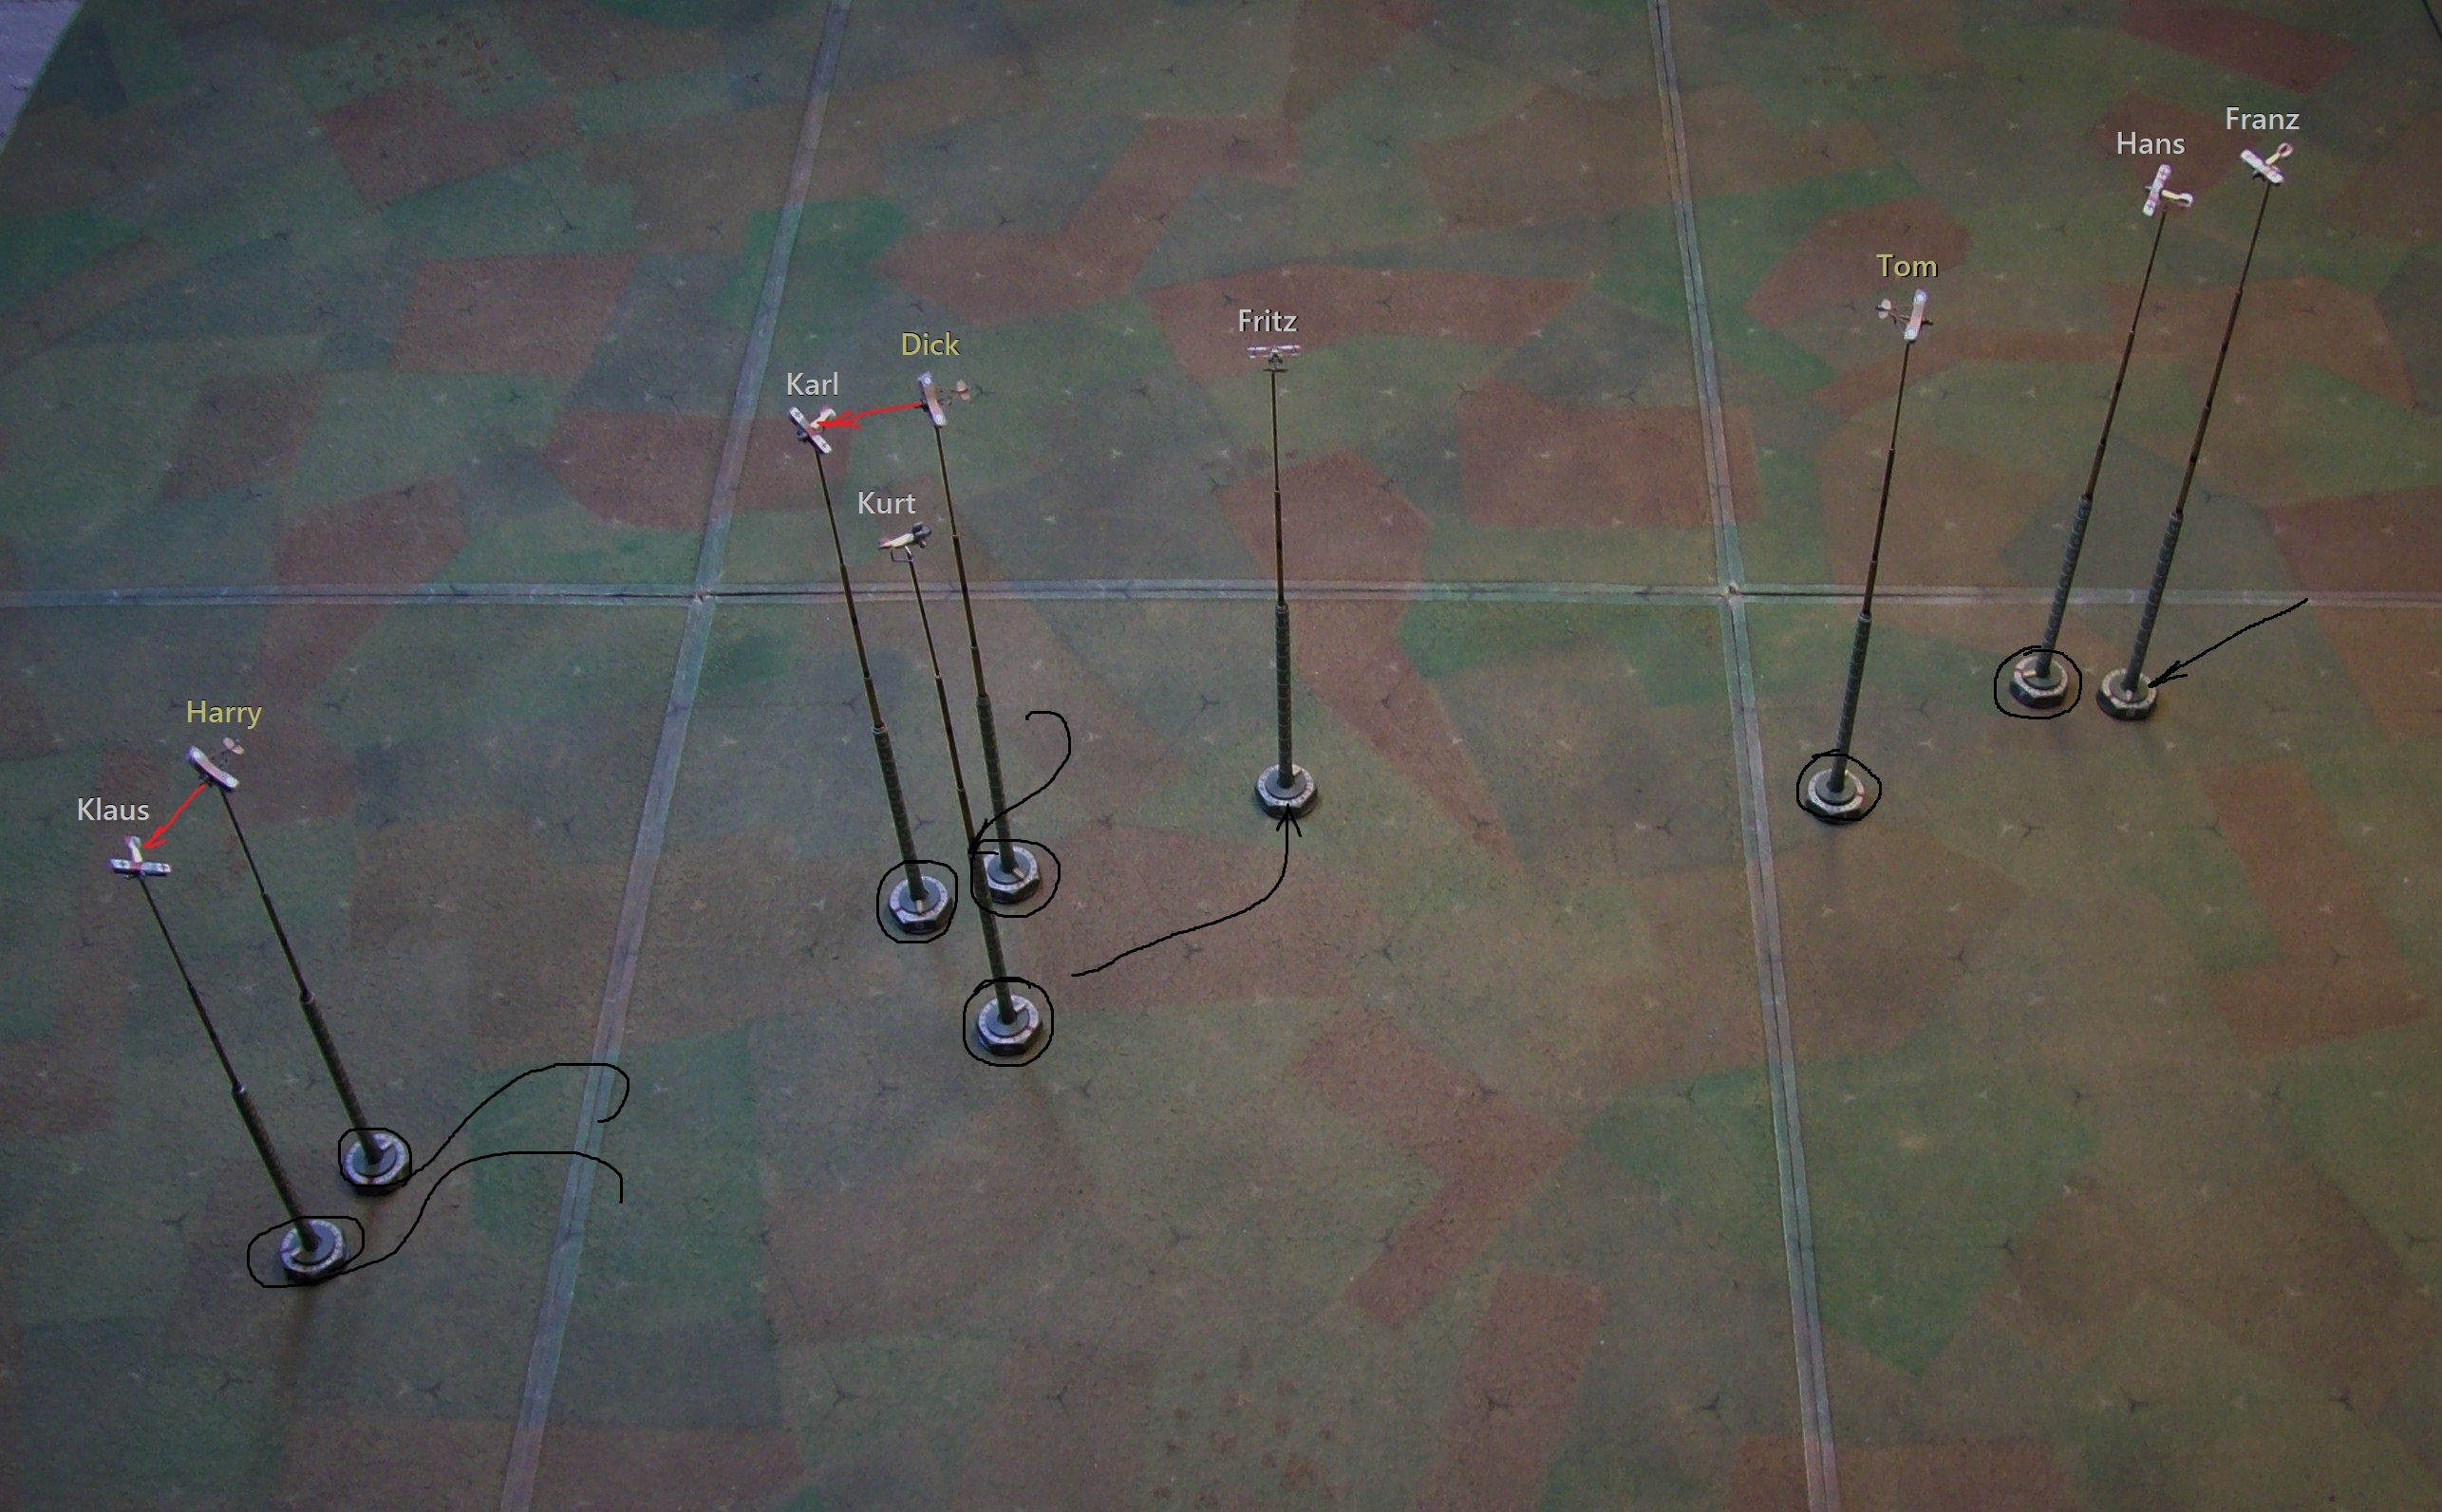
The scenario begins with the British chasing a two-seater into German territory. The leader of the DH-2 flight spots a flock of Albatros approaching from the North.
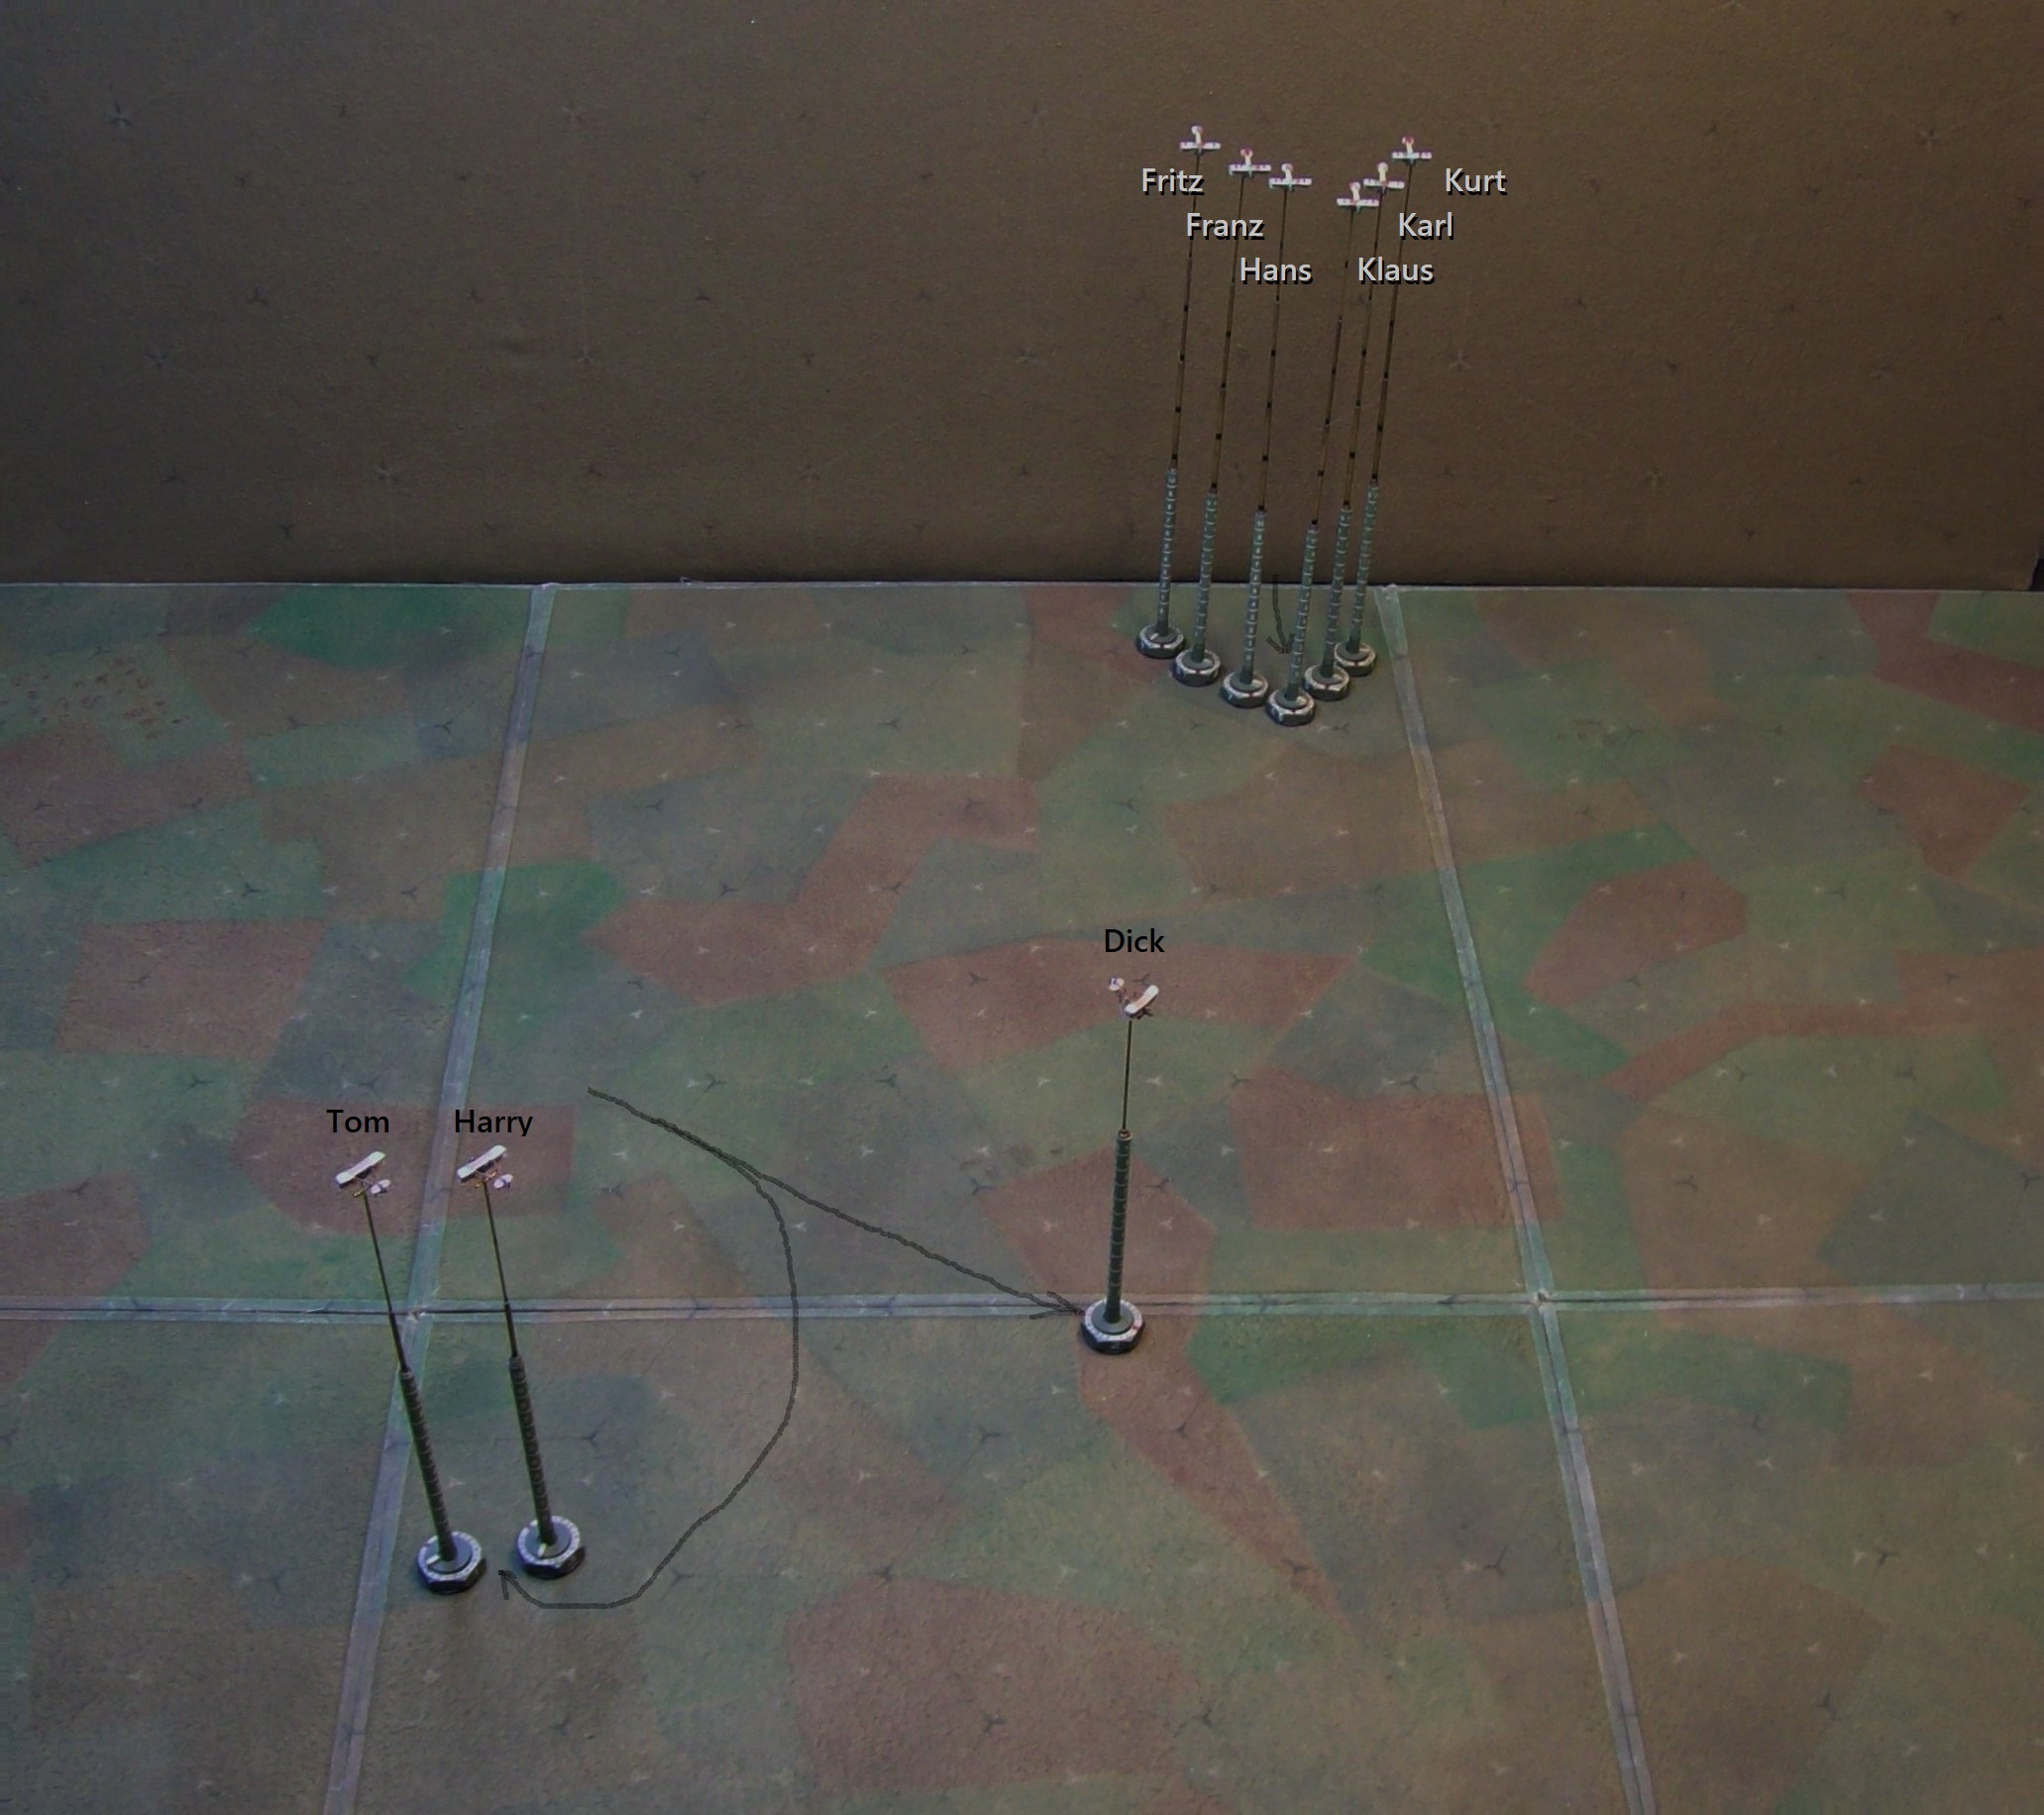
Tom, the British flight leader, turns back towards the lines. Harry stays with him, but Dick has the bit in his teeth and continues pursuit of the (now 1-1/2 mile distant, off-camera) two-seater as the German flight closes in, diving from their perch 2000′ above the British.
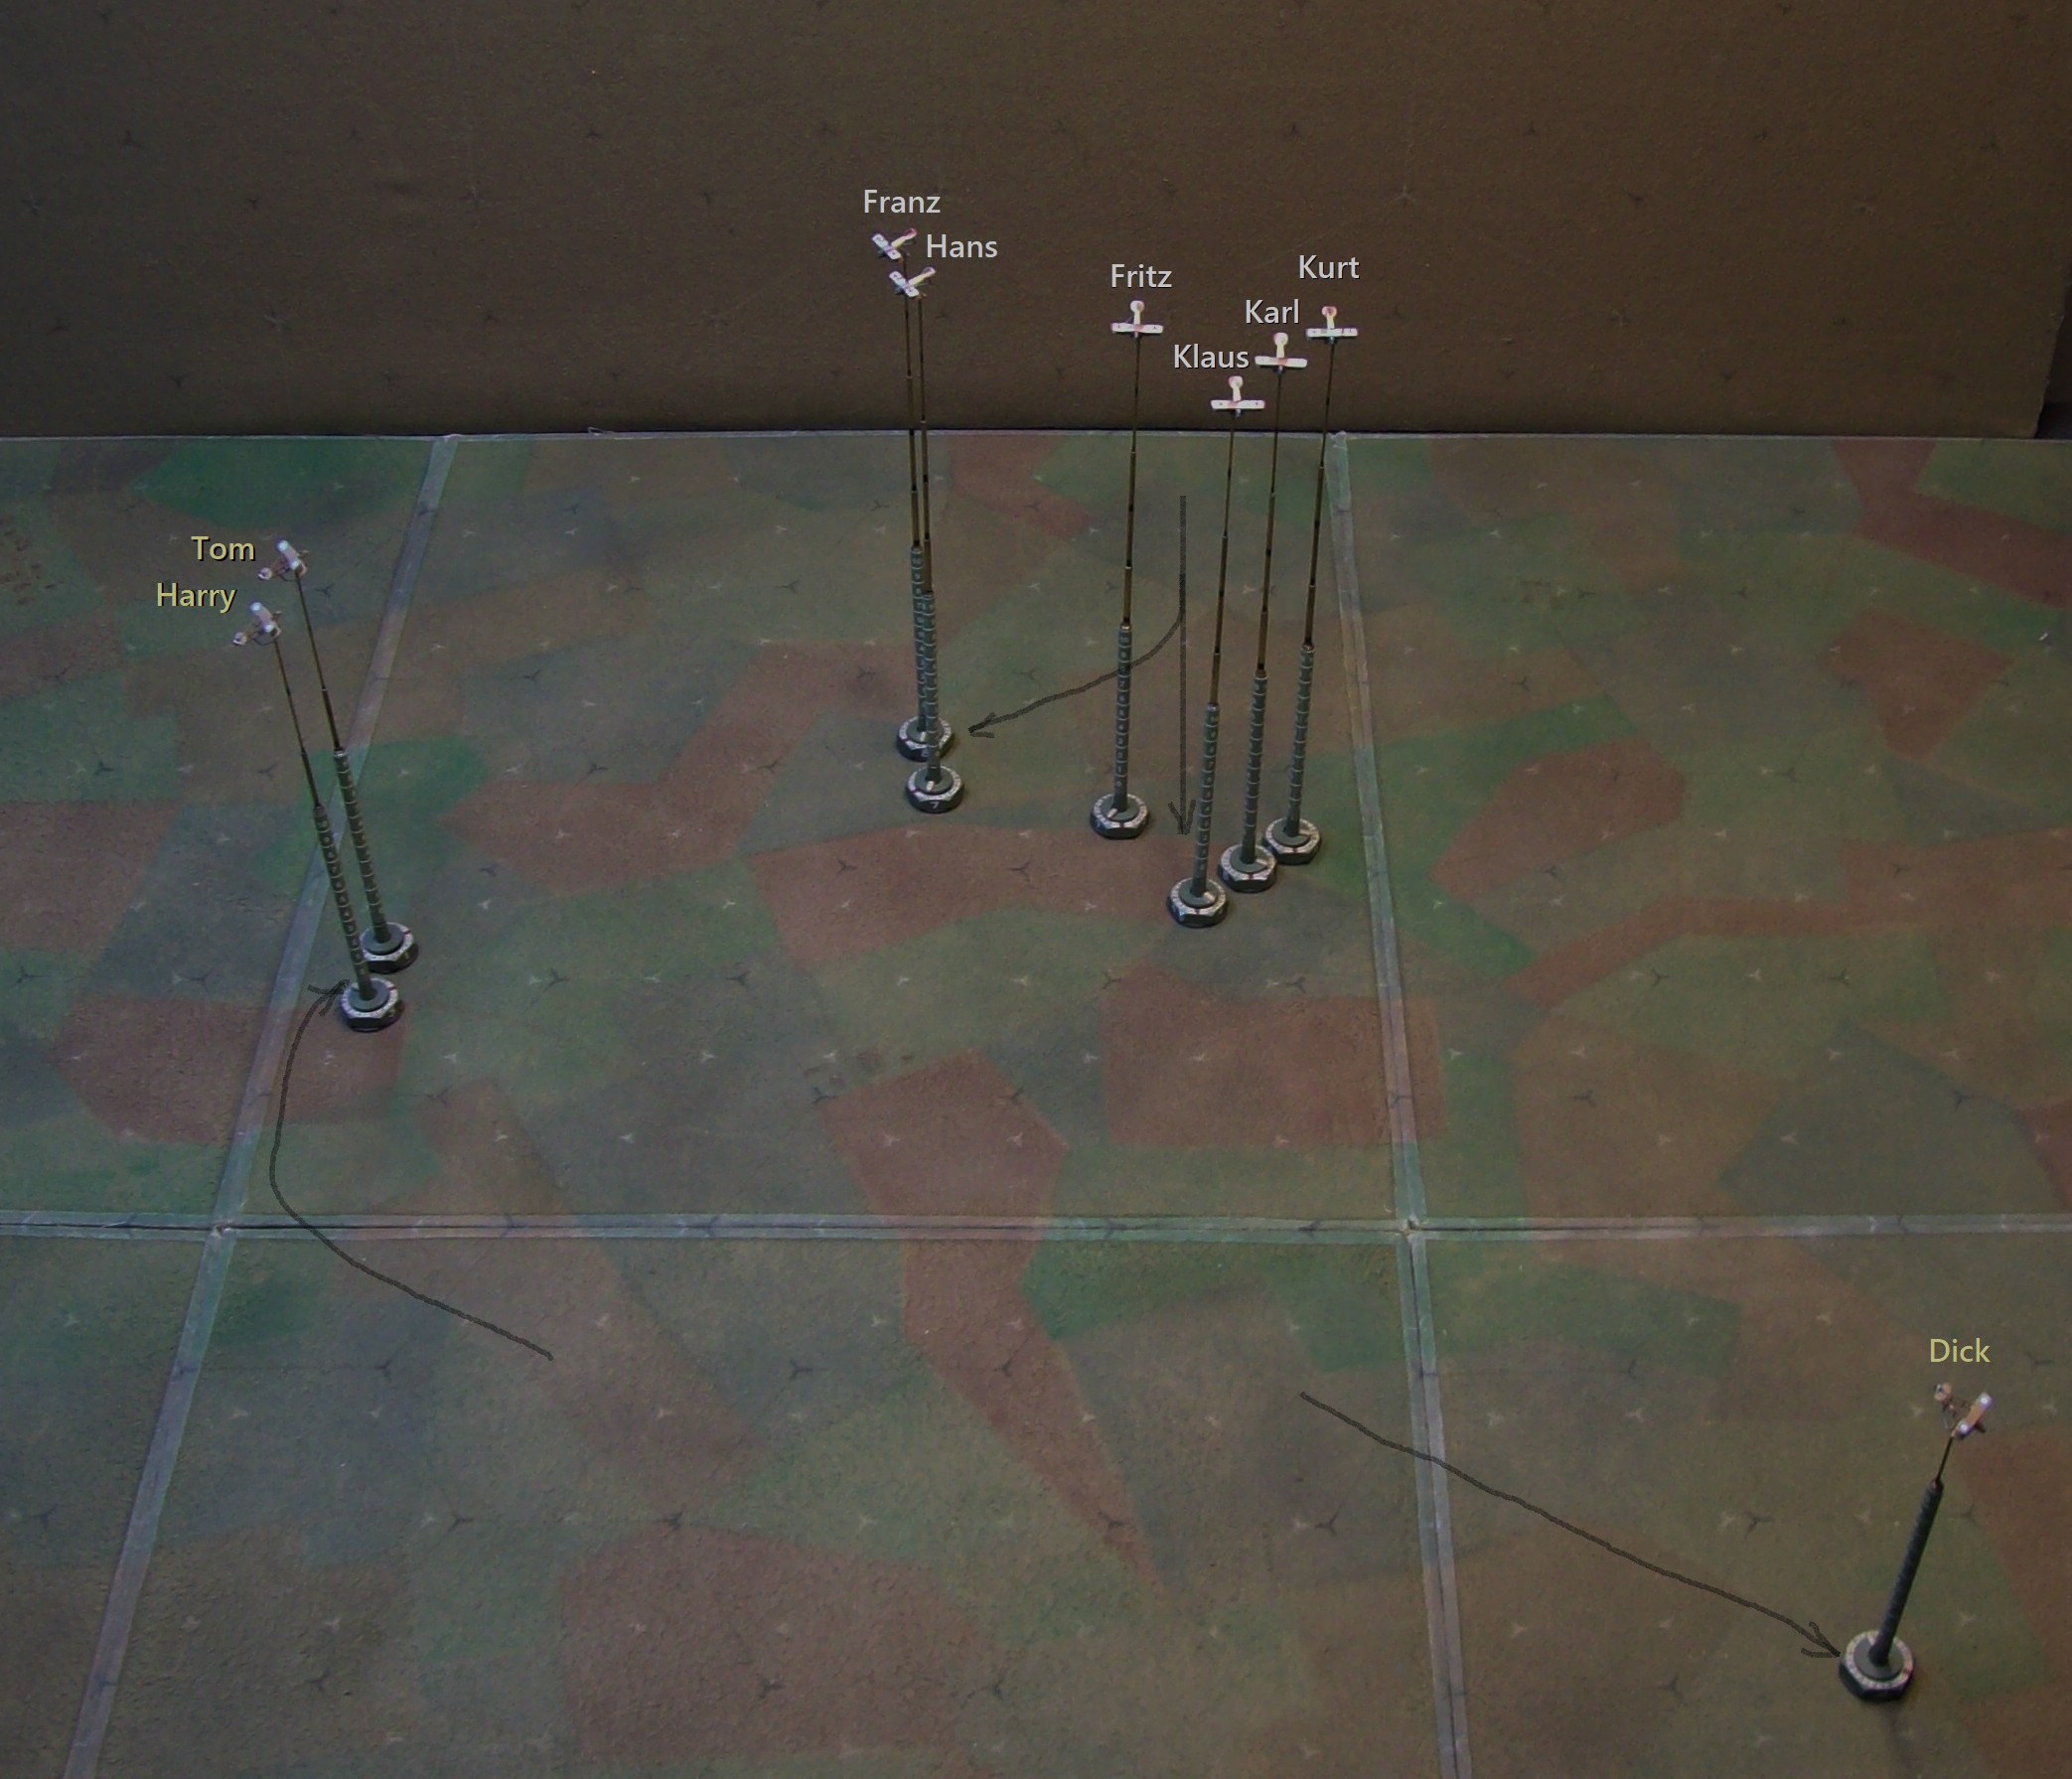
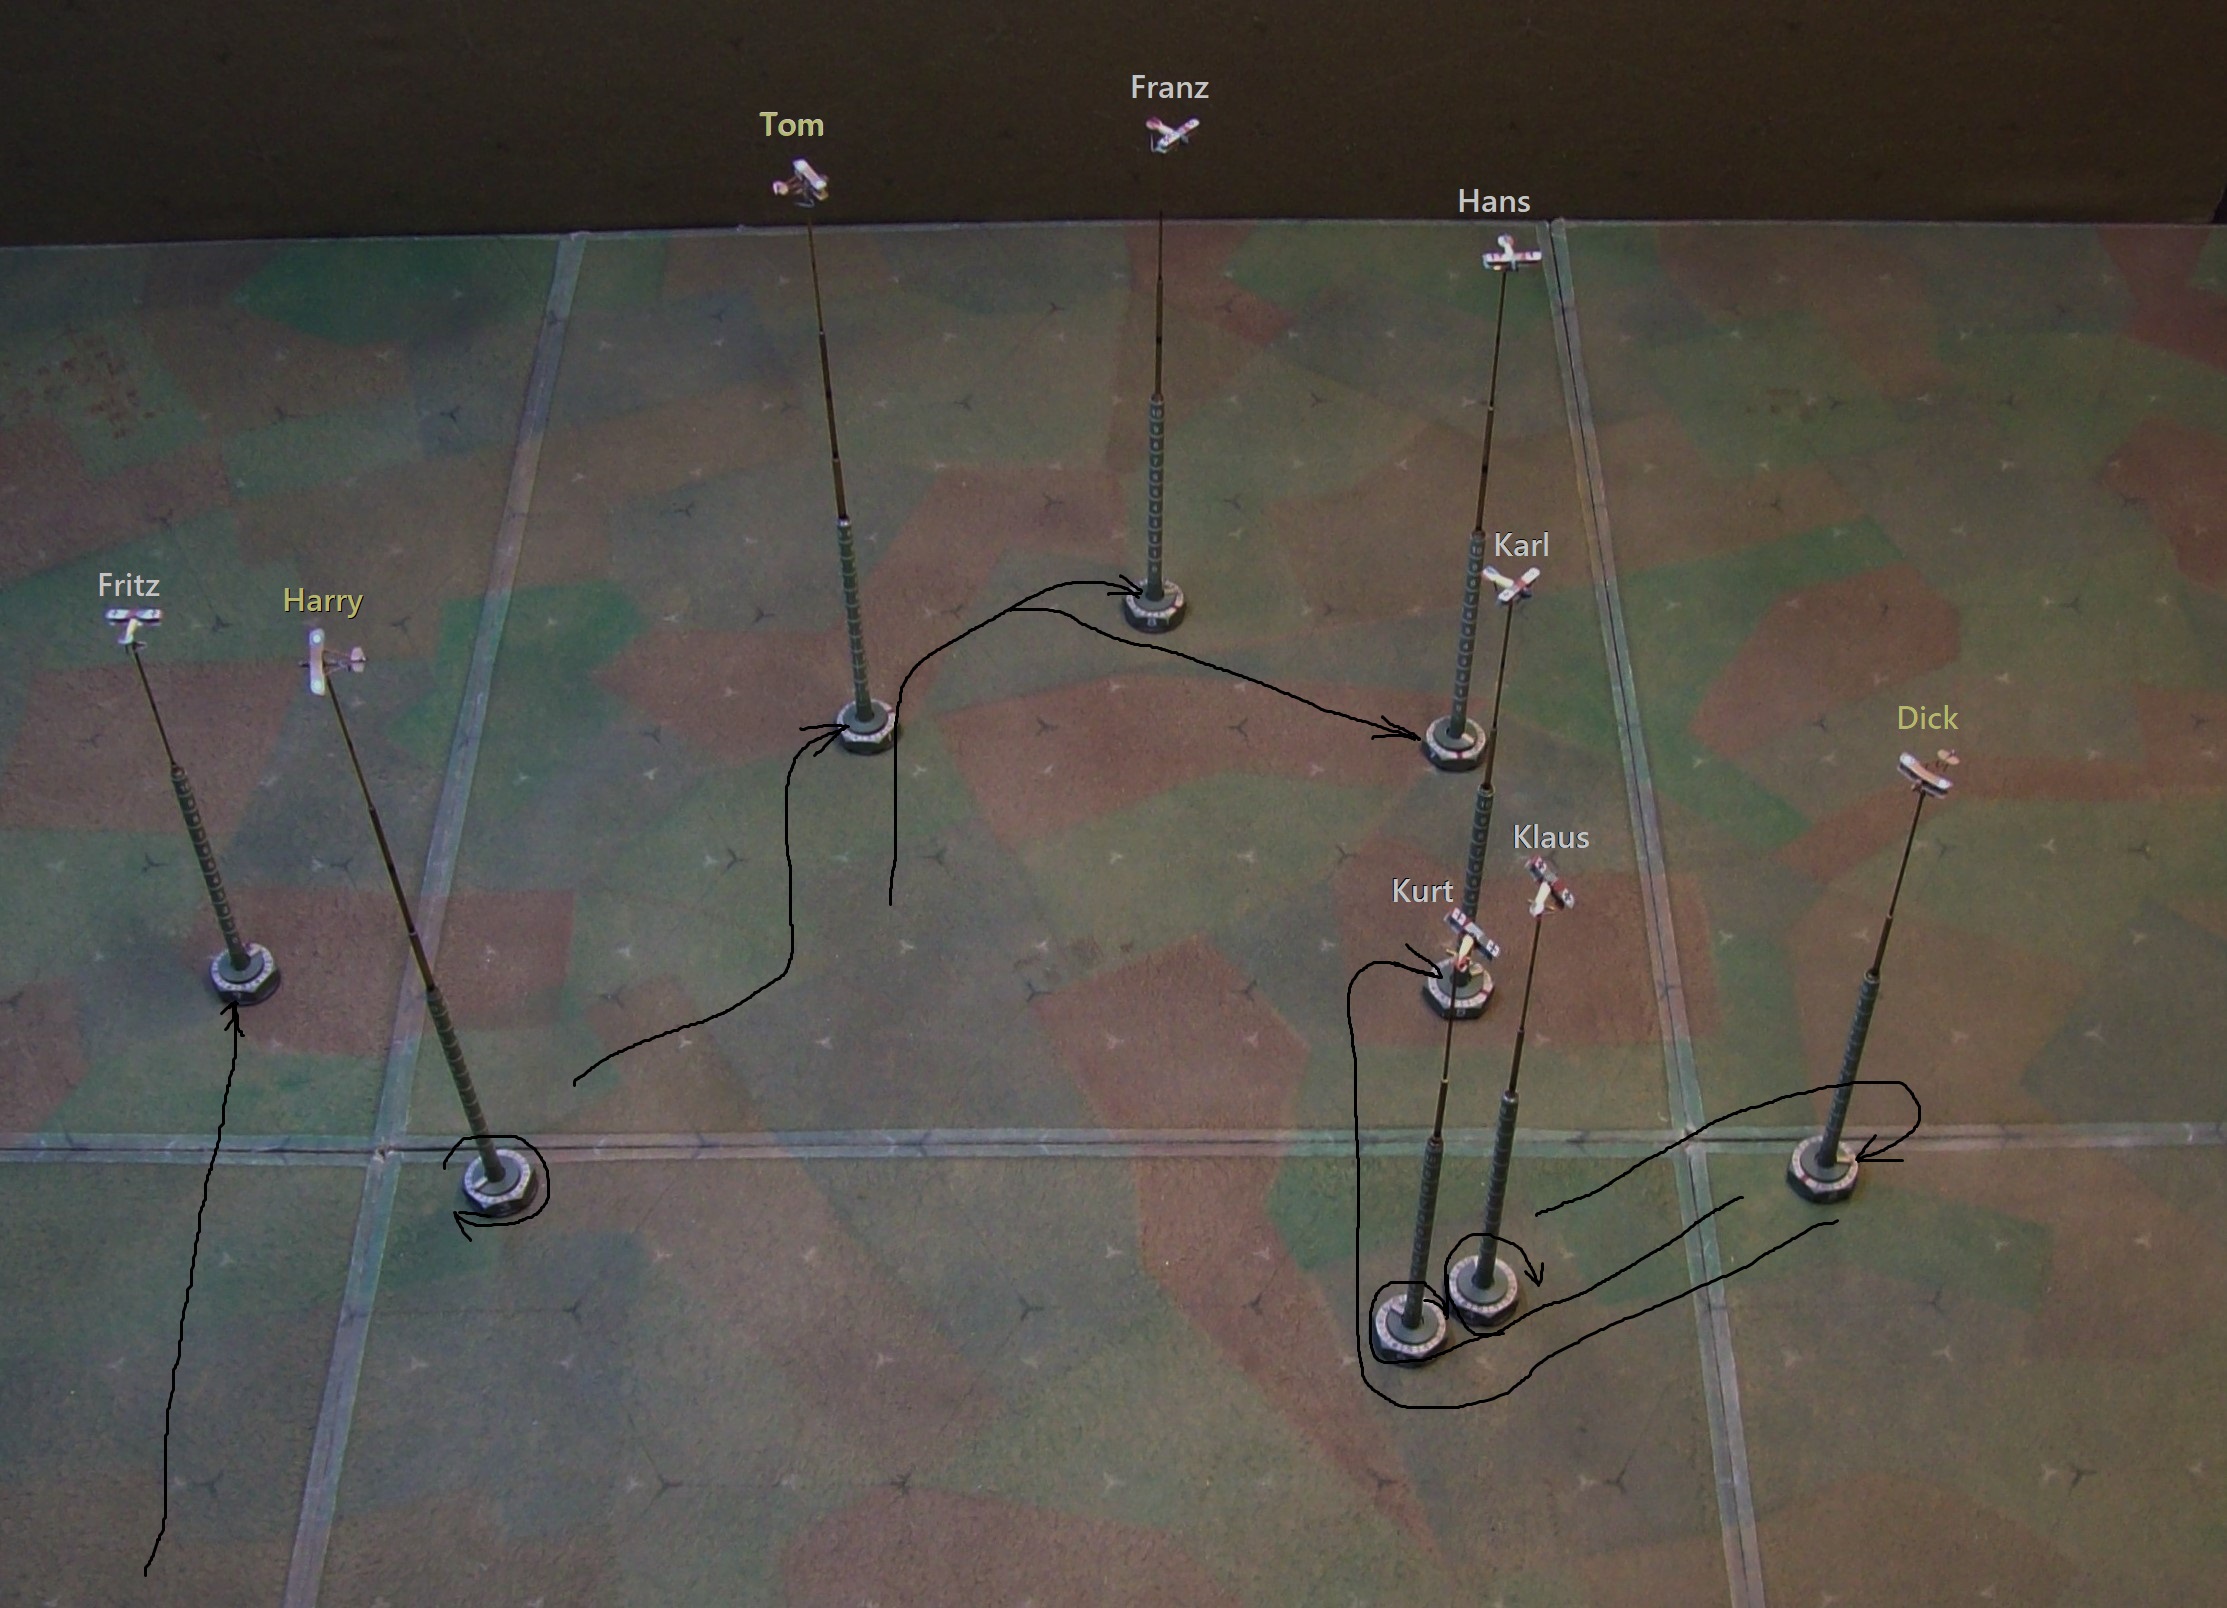
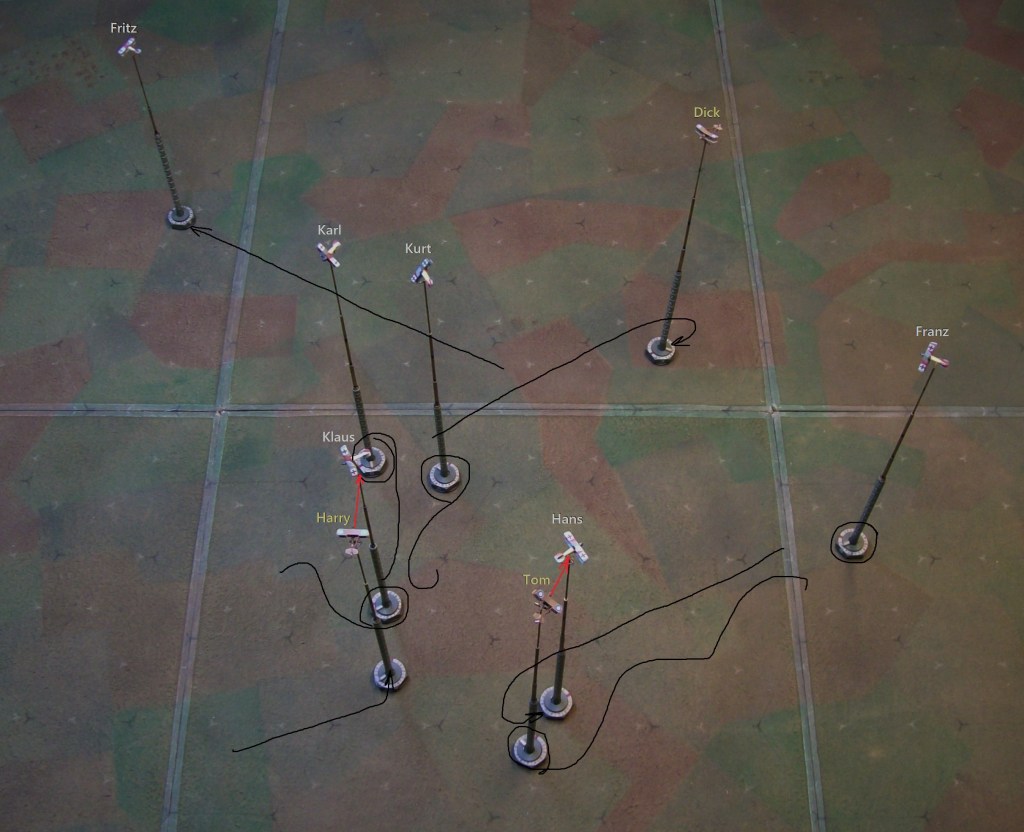
Noting the loss of one of his flight, Tom leads Harry in a climbing turn back towards the Germans, whose leader has signaled for Hans and his two wingmen to deal with that pair while he continues towards the lone ‘Vickers’. Fritz -the rookie in Hans’ group- has his head in the cockpit and fails to follow his leader’s detachment. Spoiler alert: It’s going to be a frustrating sortie for Fritz. Dick realizes that the ‘Whale’ is outpacing him and that no joy is to be had in continuing the pursuit – a quick look around reveals plenty behind him, though it may be a stretch to call it ‘joy’…?

Klaus leads Karl and Kurt in a series of broad turns to burn off speed as they continue their dive towards Dick, who has no qualms about climbing and turning to face the 3:1 odds against him. Hans does the same sort of maneuvering, but loses his spot on the pair of DH-2s so that now the British are positioned behind and Tom signals the attack. Fritz continues to direct his attention to anything but where it should be, and finds himself alone in the sky at the controls of a diving aircraft that is barreling along at well over the recommended speed limit – he pulls his finger out and eases the machine level and makes a broad turn to begin looking for…well…anything.
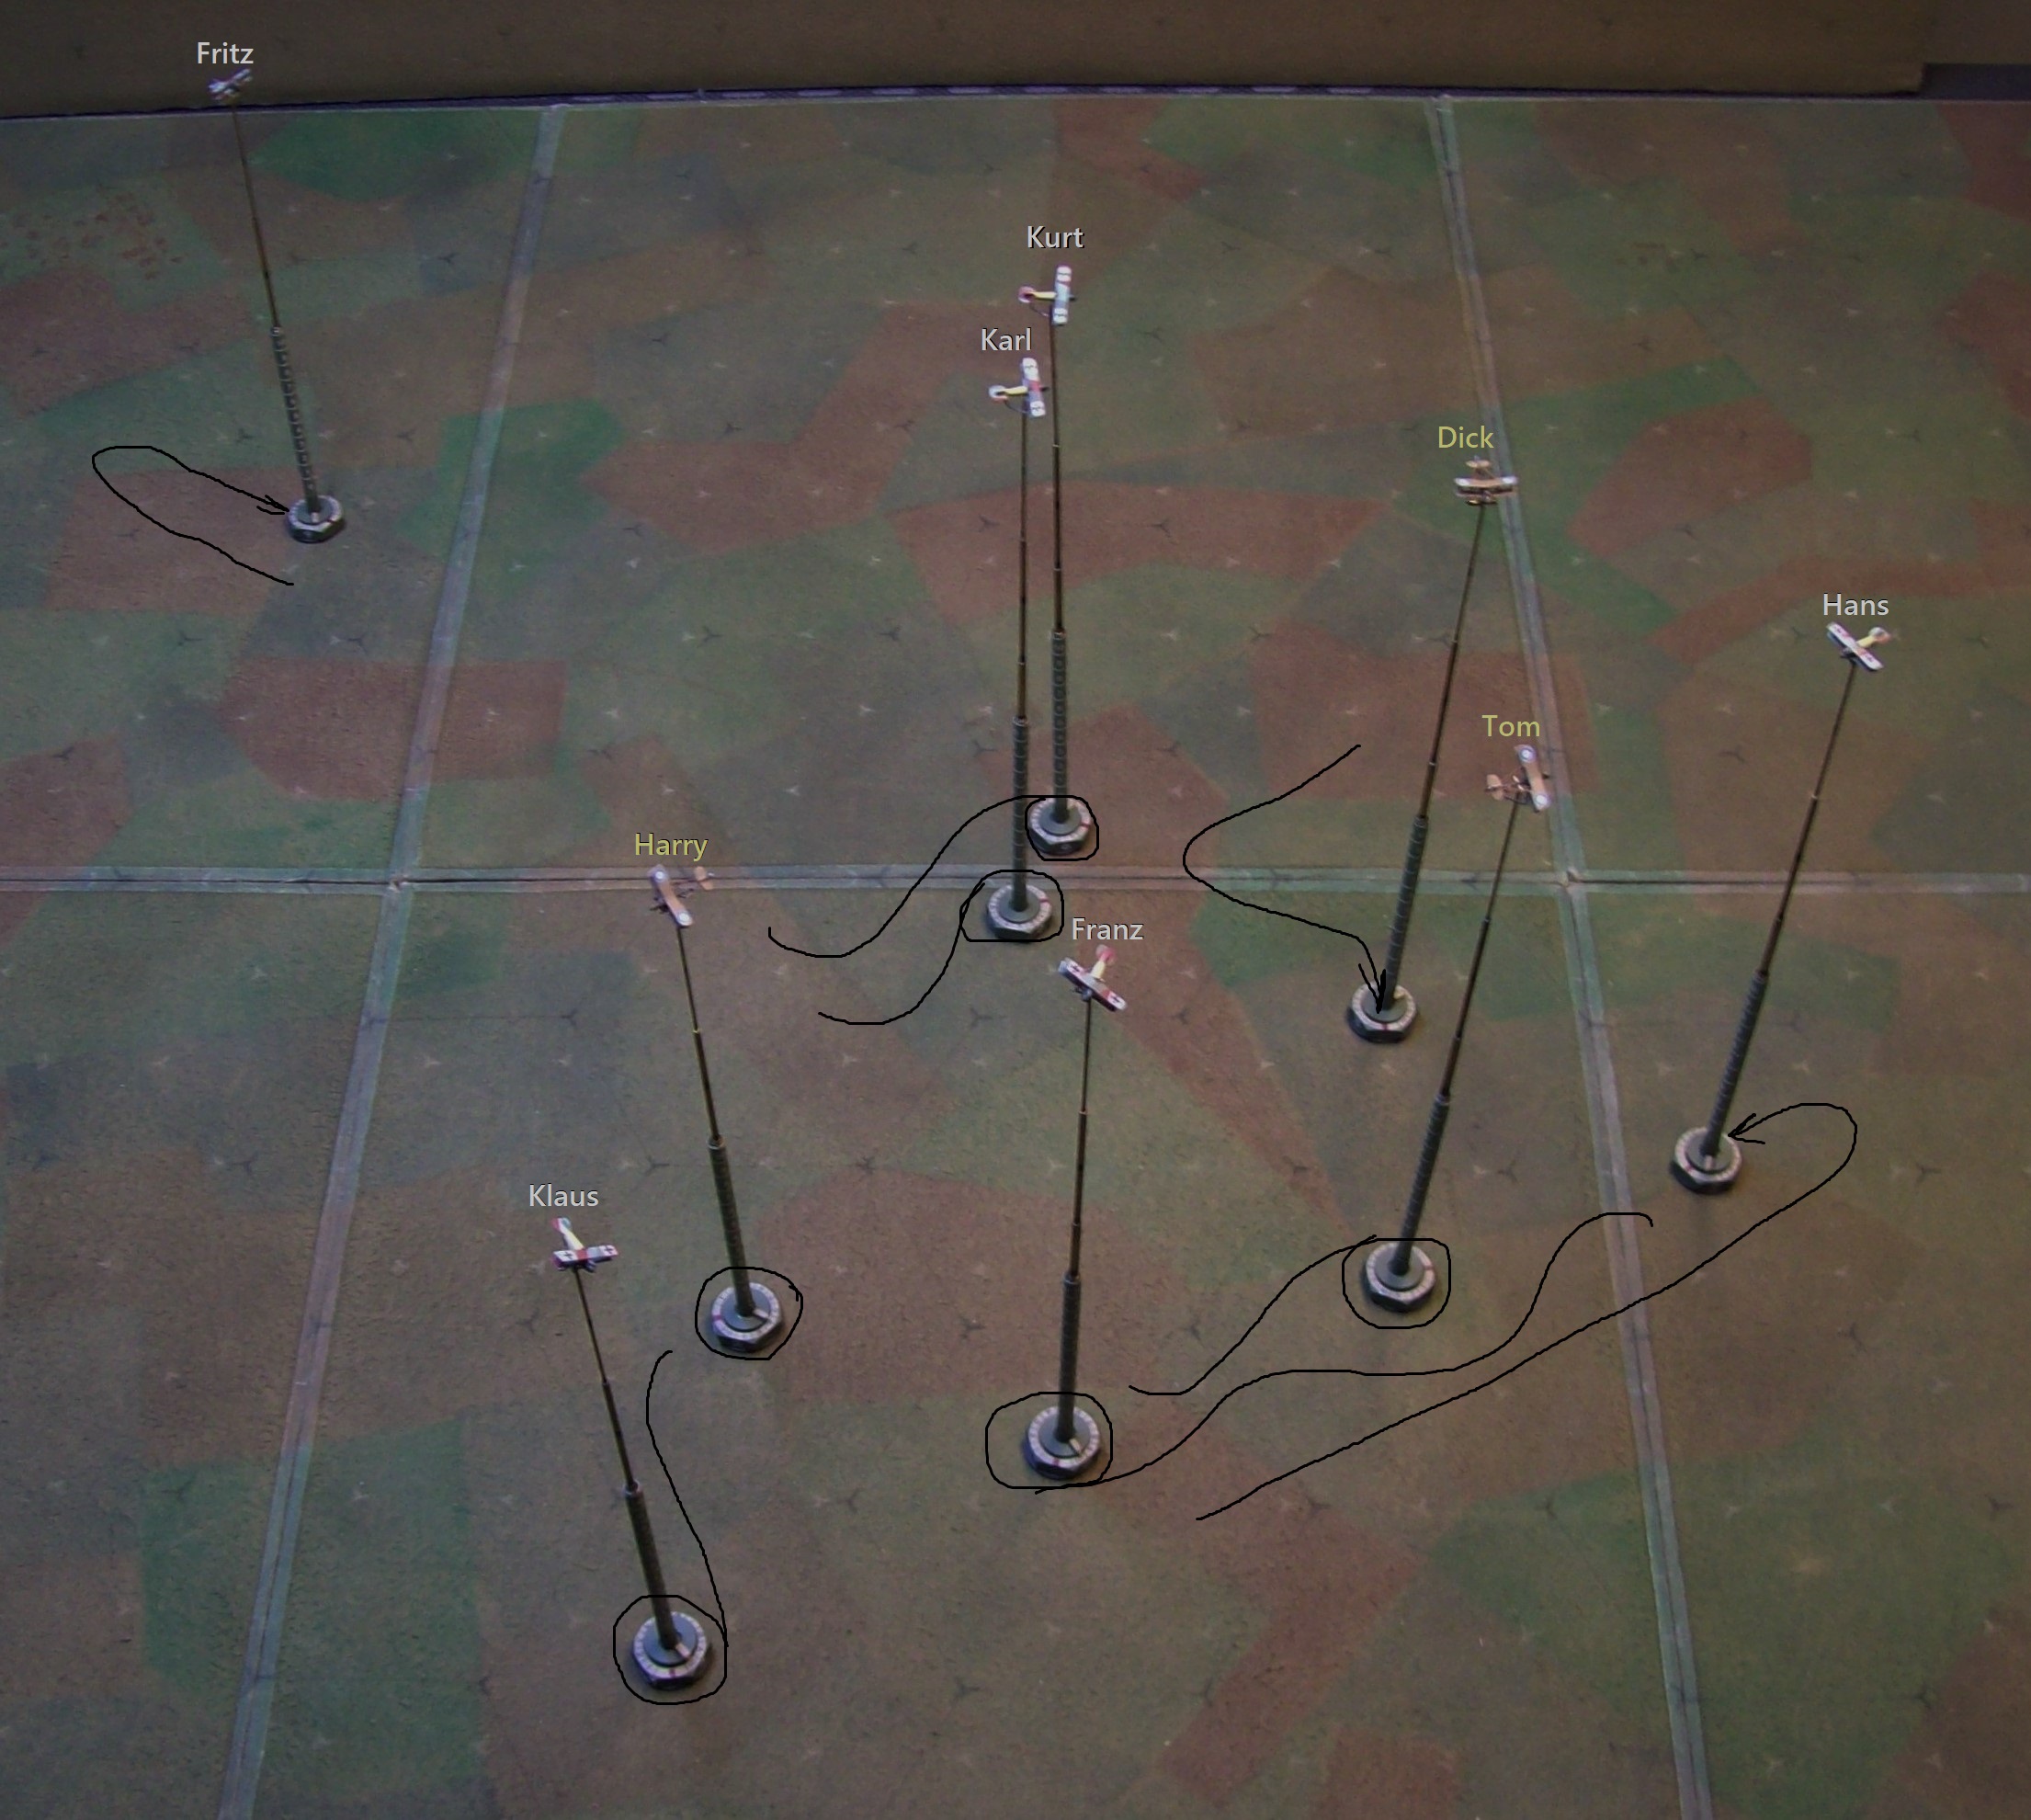
Fritz moves back to where the action is but has no luck in spotting it. He doesn’t have a monopoly on bad luck, though: Tom and Harry’s individual moves to position themselves cross each other and Harry must break off to avoid a collision, leaving Tom alone in the pursuit of the pair of Germans whose different speeds (resulting from varying engine performance) have caused them to separate as well as they unsuccessfully search the sky. Things also don’t go as planned for Klaus whose rather violent diving maneuvering costs him the company of Karl who can’t quite follow-the-leader. Surprisingly, Kurt -the rookie of the trio- manages to stay on Klaus’ wing. All is for naught, though, as the experienced Dick works his way out from beneath the attack – though he still faces those long odds now from two sides.

First shots fired: Dick has concentrated on dueling with Klaus, which has left him open to Karl’s attack – no hits are scored, though. Kurt continues to stick to Klaus through every maneuver, but doing so uses all his attention and he fails in the other, key wingman duty: To look around for trouble, and doesn’t notice Harry who -after sorting himself out from the near-collision with Tom- has worked his way over to improve the odds for Dick. Tom continues his solo pursuit while the two Germans (Hans and Franz) unsuccessfully search for signs of their foe. Fritz -a mile away in the large, (seemingly)empty sky- finally gets a bit of good fortune (the dice can’t always be against you!) and manages to spot the fight developing behind him.
The action in the center was messy as both Karl and Klaus got shots off on Dick amid the swirling, but only Klaus managed to put a few holes in the DH – nothing to worry about (yet). Kurt continued earning flying points for sticking to his leader, but also continued to fail noticing Harry who positioned himself above the fray in a good place to witness what happened when Karl -intent on his target- got in the way of Klaus’ own attack. Karl -unaware of the trouble he’d caused- finally managed to land hits on Dick (who will be forced to make a morale check as the result of getting hit by an unseen enemy). Klaus and Kurt, though, are forced to leave the area (in separate directions) maneuvering to avoid colliding with their clueless comrade. Harry took full advantage of the chaos and followed Klaus out of the area – only to see his well-laid attack fall apart when his Lewis stopped after a couple rounds and required some pounding and cursing to cure the problem and prevent a jam.
Tom is still after Franz, who seems to have taken Fritz’ role of futile searching. Hans manages to spot Tom, and turns to set up an attack. Fritz? He’s on his way back, hoping for a chance to show himself in the fight in a better light than ‘Where were you?’

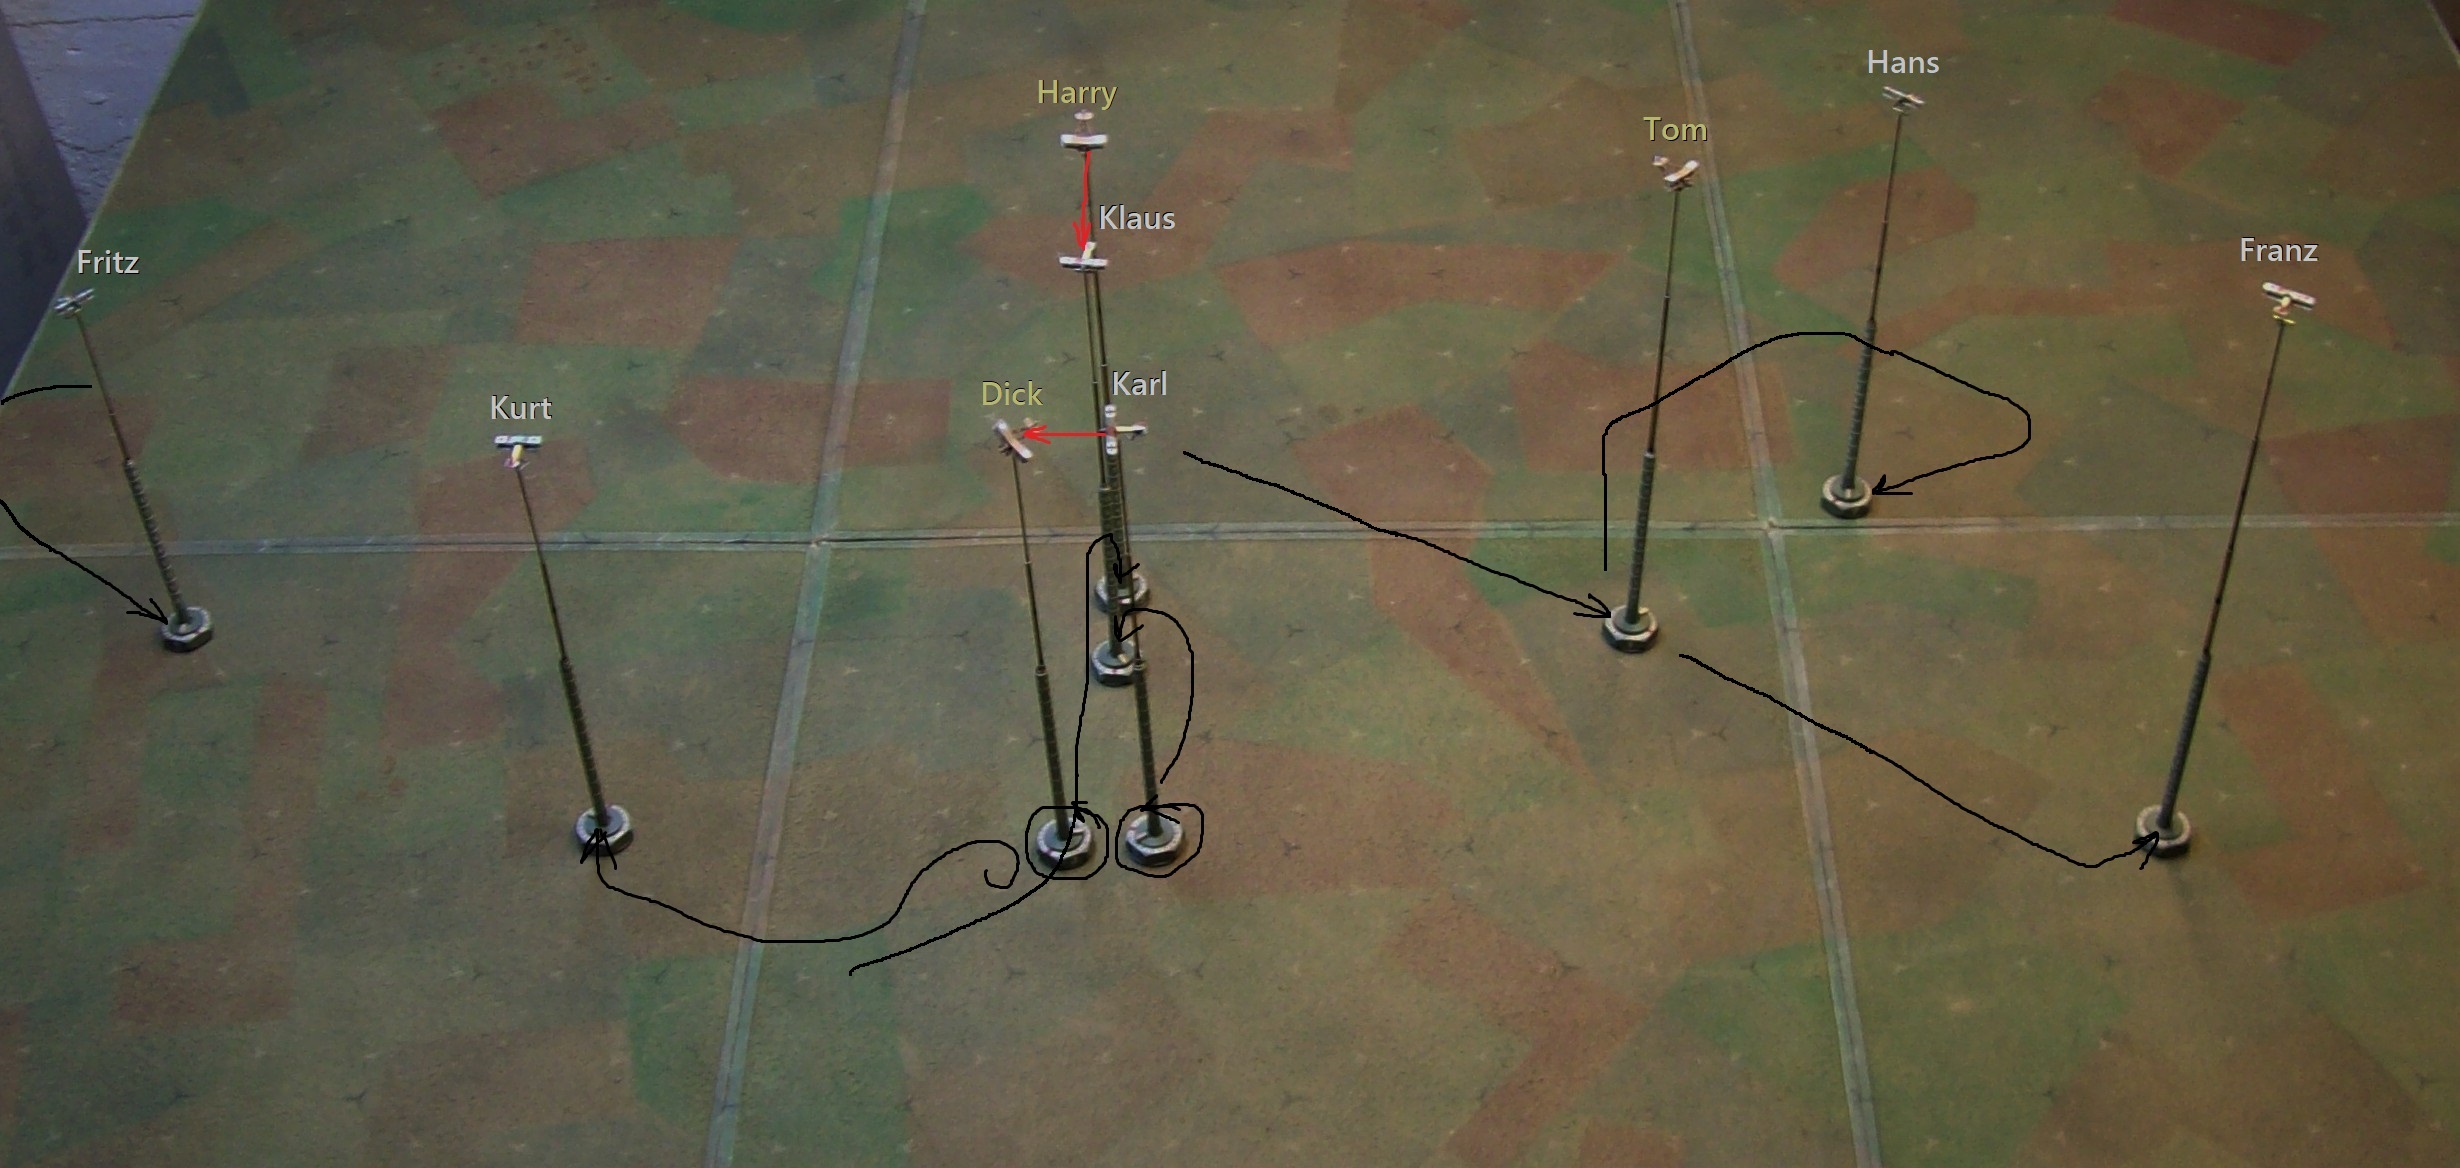
Fritz closes in and picks Dick out as his target from amongst the confusion as -on the right- the Englishman separates himself from the fray: Fritz is now almost within range to fire and make his mark! Kurt -the other rookie- has recovered from the fright of the near-collision and manages to get back to where he was (although below the other aircraft in the area) – but where was Klaus, his leader?
Harry pursued Klaus through the fray as the German searched the sky for some sense of order. Suffering a fusillade of bullets that tore into his Albatros, seriously damaging the ‘craft, let Klaus know that -though unseen- someone was there, and he’d be facing a morale check similar to the one Dick took.
Dick passed his check after taking hits from Karl (getting shot at is part of the job, eh?) and took a few more holes before managing to give the German the slip and find a little breathing room in which to assess things.
Tom, Hans, and Franz perform a cautious dance as none of the three is willing to take the risk of closing to within effective range.
The dance on the right continues – a dullness that Fritz would welcome as his plans of attacking Dick are dashed when they collide -literally- with those of Karl. The poor rookie frantically maneuvers and dives away from the near-miss, but he’s in better shape than Karl who -upon sorting himself out from the mess- finds himself in a bigger one with Dick firing at him. Small mercy: None of the bullets finds more than the nothing that makes up most WW1 planes. Kurt circles up to help – Dick may be the one shooting now, but he still faces poor odds.
The real loser of the turn is Klaus, who fails his morale check and maneuvers randomly to avoid the fire but is unsuccessful in evading Harry who applies more damage to the suffering Albatros which now demands much of Klaus’ attention as more than a few of its pieces-parts are not quite right. The only bright spot for Klaus is the nature of the Lewis gun: The drum in Harry’s is now empty.

Bullets fly on the right as the combatants finally take the plunge, but to little effect. Franz’ shots go wide and he fails to stick with his target, and Tom lands but a single hit as he chases Hans around the battlefield – poor results for an entire drum of ammo…a fresh one -and a reassessment of the situation- is in order.
Dick resets his aggressive attitude and maneuvers to keep Karl and Kurt at arm’s length while he, also, takes stock of the situation – ‘Attack Everything’ are good words, but there seems to be quite a lot of ‘everything’…
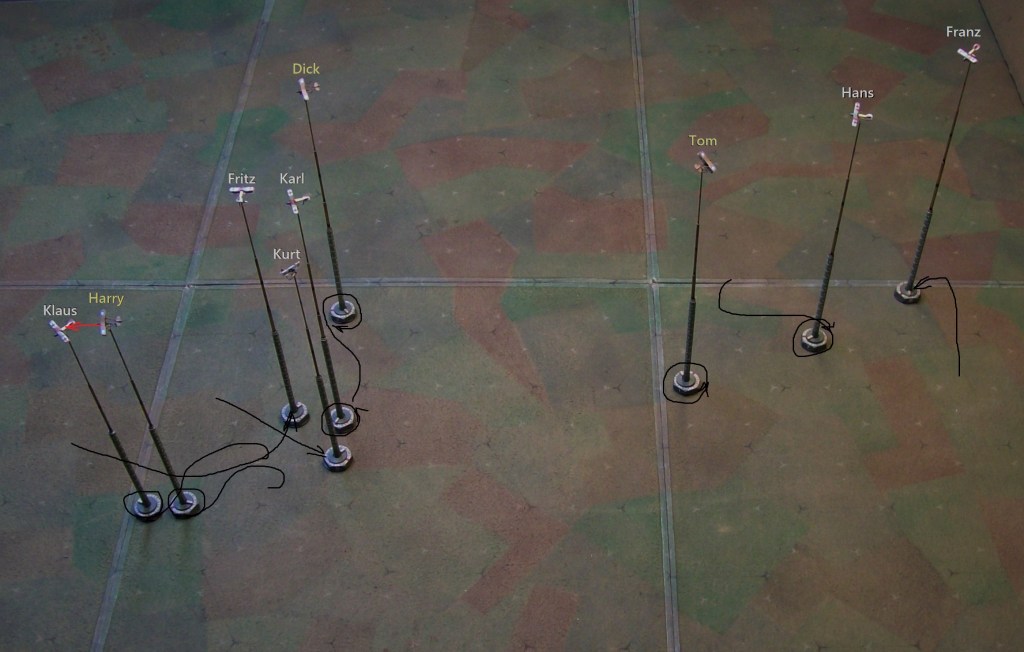
Harry is fortunate to slap in a fresh drum of ammo on the first attempt and turns to see Klaus, who -in contrast to the cautious mood of Tom and Dick- remains aggressive but struggles to control his ‘craft and ends up presenting himself as a target to Harry – ‘Why not?’ says Harry, as he squeezes off a snapshot. Nothing further of note damage-wise, but enough to squelch the remaining combative spirit in Klaus who decides that ‘The better part…’ may be the way to go.
Fritz…poor Fritz. We see him once more hurtling along at breakneck speed away from the action. He spies the trenches ahead and curses: His newly-won position in the Jasta lies in serious jeopardy.
Fritz wrenches his Albatros around in a fierce turn that tests the mettle of his ‘craft and himself, determined to get back up to the fight and restore his lost dignity. His potential foes, however, have replaced ‘fighting’ with ‘surviving’ on their lists of things to do as the British pilots take time to stay clear of the enemy – even Harry chooses not to pursue the stricken Klaus as the German takes his leave.

Time to go. While the German flight leader sets course to limp home, the British seize the moment handed to them (game translation: their initiative rolls placed them all at the end of the turn) and put the noses of their deHavillands down and aimed southwest for the nearest lines. Time for an evaluation.
Although the Albatros would hold a speed advantage in a race, the British in this case got the drop on the Germans and had enough altitude to provide a good chance for staying out of gun range until well across the lines, where the now-leaderless Germans would perhaps choose to forgo continued pursuit. Such an outcome is certainly not guaranteed but I decided that it was good enough to call the game and move onto something else, even though poor, unfortunate Fritz had once again worked his way back into the fight…
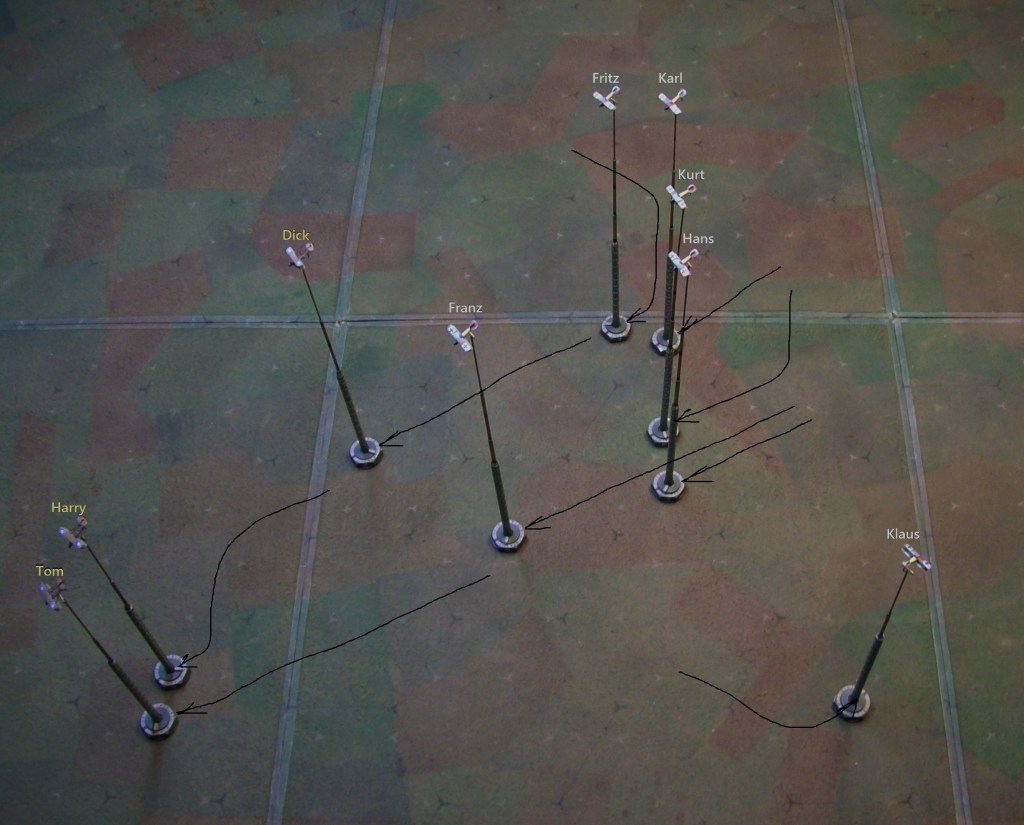
Just for laughs, here’s a shot of the end which shows (most of) Fritz’ path over the course of the game: