The Germans come down the hill on two sides, hoping to defeat the Americans and push down the last bit of track to Mouterhouse (where they were supposed to be hours ago…) with enough of the Company to be able to claim to have (sort of) completed their mission and made a difference in Nordwind.
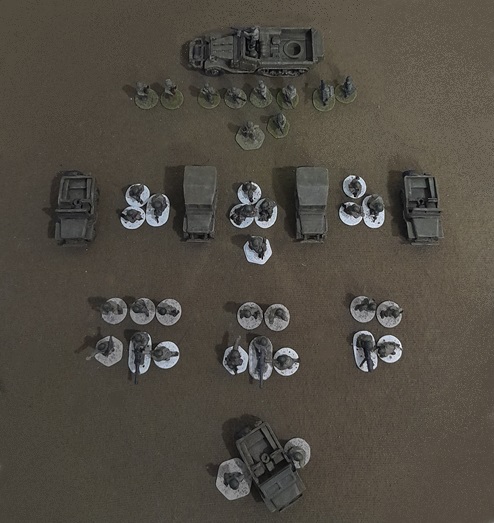
The (too common) loss of German Platoon Leaders in the campaign so far means that the attack will see the Rifle Platoon -with an extra LMG in the 1st and 2nd Gruppe- led by the Company 2iC, while the CiC will supervise the Sturm Platoon’s progress from the comfort of his new ride: the captured M8.


The American 3rd Platoon waiting for them is not thrilled by the sound of a vehicle coming down the track, but heartened hearing the halftrack of the 19th AIB (which will enter the game from the southern table edge) coming up the hill from HQ — bearing, it’s hoped, a withdrawal order?
The Platoon Leader hopes that the mortars (which have established a target on the track) can once again deflate (if not defeat) any German move down the hill – though he’s been advised that dropping rounds at the same rate could lead to an announcement of “Rounds Complete!”.
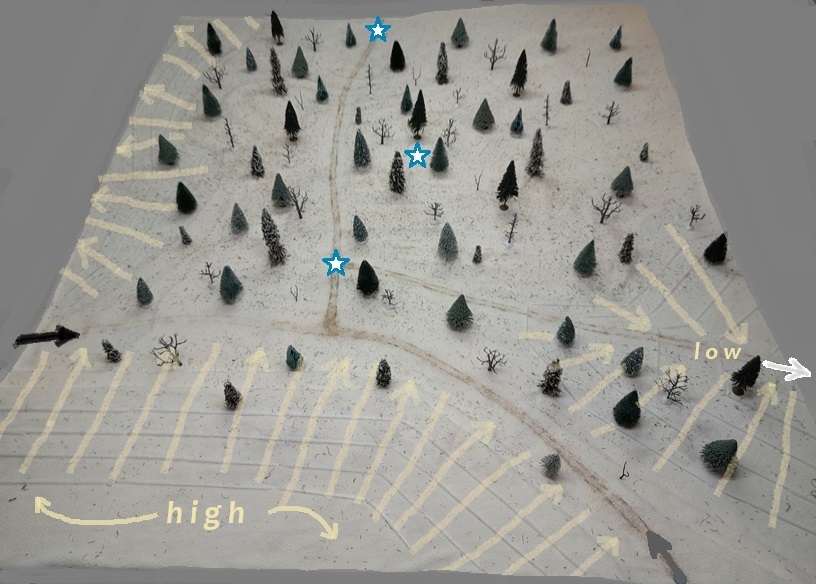
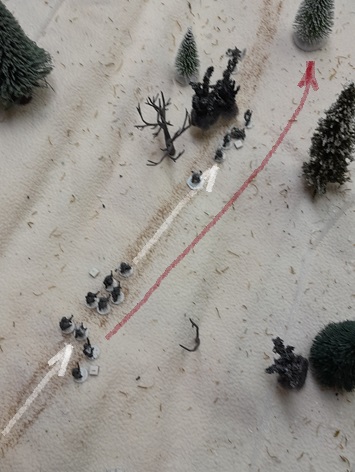
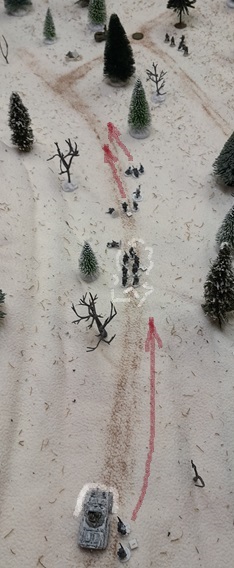
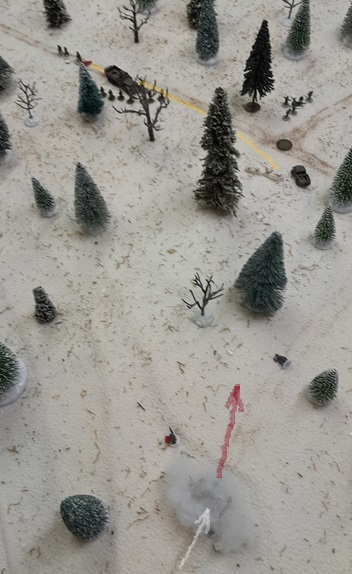
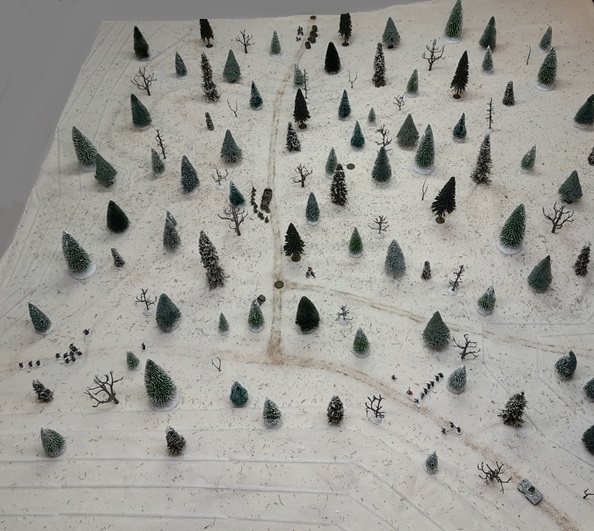
The German Rifle Platoon will enter on the left side (black arrow) while the Sturm Platoon again comes down the hill on the right (grey arrow).
All troops involved in the coming fight have had a long night and want nothing more than to see the day bring them a chance for a bit of rest: The Force Morale of each platoon = 8.
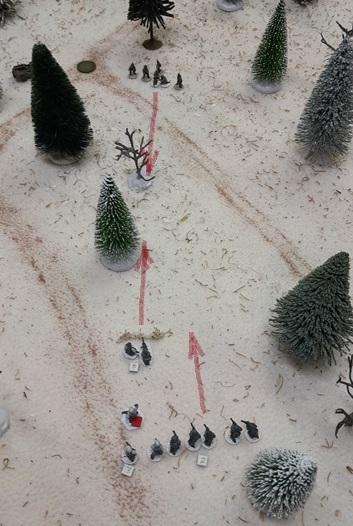
The Germans waste little time getting both platoons on the table in force.
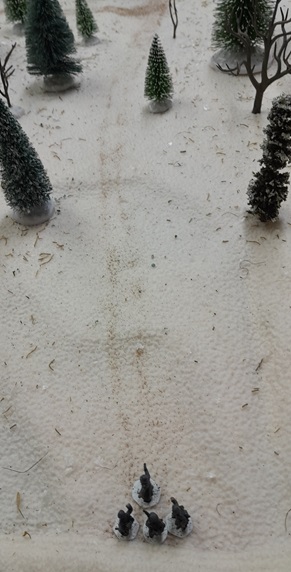
NOTE: To accommodate the fact that the track’s curve (that blocks LOS) is ~10″ off-table, the Rifle Platoon (on the left) has a single figure for each unit placed on the table edge on its first activation to indicate its presence on the track (where they are subject to spotting by the Americans). They will then deploy normally (as on a JOP) on the second activation.
The American SL hopes to keep the attackers coming down the hill at bay with the mortars, and so turns the HMG to face the threat coming around the other side.
The first attempt to contact the mortars fails, though – “Wake Up!” he shouts to the man in the Jeep…

At least the mortars are set up and ready to go, and respond when contact is (finally!) established. The 19th’s halftrack comes on and uses the early triple-phase the Americans roll to move smartly up the track.

The Sturm Platoon’s plan is to simply rush down the hill through whatever mortar fire drops. The Americans oblige with three rounds of ‘whatever’ ( sorry – no photo of the second round, where only a single tube was on-target but caused no damage) that test the attacker’s resolve by taking out four men and knocking out the leading gruppe JL (which, apparently, isn’t noticed by the men as morale doesn’t suffer).

The Grenadiers pause to drop some (ineffective) rounds on the HMG position, but everyone else just continues their pell-mell race down the hill in the hopes of running through the threat.
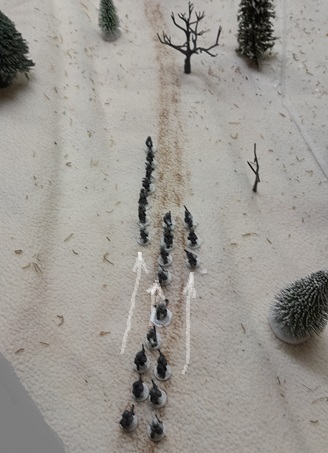
On the other flank, the German 2iC deploys with the two gruppe and the rifle grenade team that had been on the track, and immediately loses two men to fire from the HMG.


The (only) smoke grenade they have is thrown ahead to provide a bit of cover, and the two gruppe move up at the urging of the 2iC. (A 4x 6s double-phase was rolled, but since he isn’t the force commander on the table it only allowed the 2iC to move a short way…)
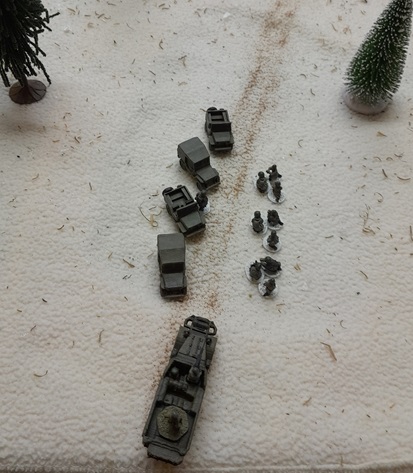
Seeing the halftrack move up and the squad dismount behind him, the Recon SL figures it’s just about time to pull back from the intersection that has Germans closing in from two sides.
He gives the order to withdraw. His M8 crew pile into the Jeep, but the 50-cal team is a bit slow to pack up so they’re not able to move out just yet…
The delay proves costly, as the Sturm Platoon rolls a triple-phase and continues its advance down the hill (motivated in no small way by the arrival of the CiC in the armored car behind them…).
The lead assault gruppe and trailing rifle grenadiers put fire onto the Americans at the intersection. The attack takes out two of the M8 crew, kills the HMG JL (causing FM to drop to 6), and pins the remaining men.
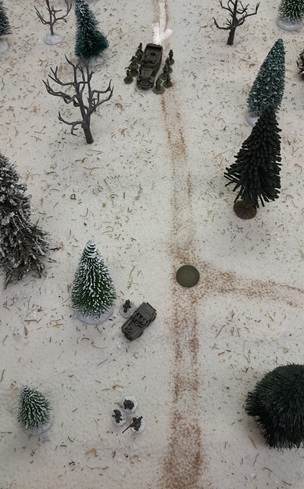
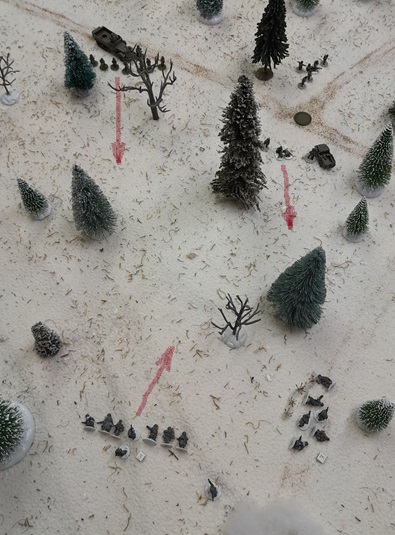
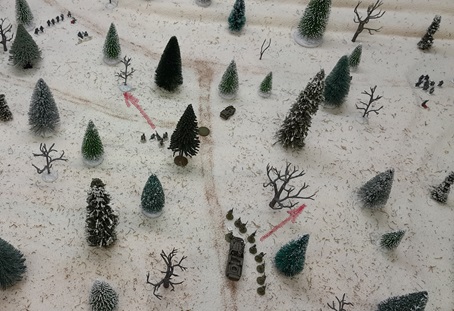
An overview of the battlefield:

Since the leaderless, pinned 50-cal team can’t go anywhere, the SL pulls shock from them. They reset their gun and kill one of the assault gruppe that fired on them. The American next-line HMG (with the second M8 crew in support) deploys and opens up as well, putting shock onto the leading Germans.

The squad from the halftrack gets into line and their leader puts them on overwatch looking through the trees down the slope.
The Germans accept the challenge to stand and fight by setting up their (captured) HMG. It, the lead assault gruppe, and the grenadiers all fire down the hill at the pinned men at the intersection, leaving only the Platoon Leader standing — U.S. Force Morale drops to 5.
Moving for the Germans doesn’t go as well as the firing: 2.Gruppe -heavily shocked from the previous running and mortar fire- fails to move at all after two attempts (rolling 5 dice!). They needn’t worry about what the CiC thinks of their inability to advance: He’s busy yelling at the poor driver who stalled the armored car!

The second American 50-cal continues firing, taking out the loader on the German gun, pinning the team, and wounding the Platoon Leader behind them – The Sturm Platoon’s Morale drops a point.
Should I stay or should I go now? The Recon SL decides to stay, and calls in a strike from the mortars. Though one of the tubes is now out of ammo, this round contains special ‘Clarke-seeking’ bombs that wound one of the assault-gruppe Junior Leaders and kills the other – dropping the German’s morale another point (to 6).
Fire from the pinned German HMG puts some shock on the American gun, while 2.Gruppe finally manages to shake off its lethargy and move up into a supporting position (- maybe they just didn’t like their leader?).

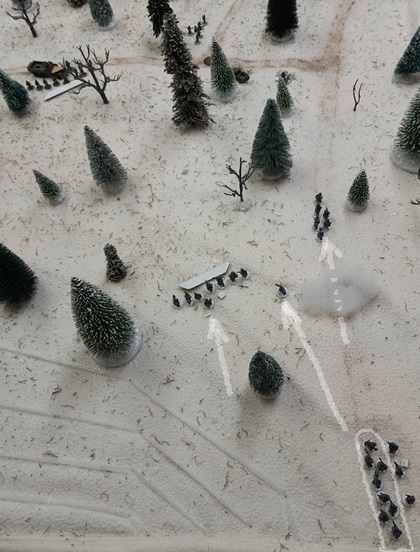
While the fight raged over on the hill (and before the U.S. HMG on the corner was taken out), the German’s 3.Gruppe advanced through the smoke towards the rear of the 50-cal position while the platoon’s last gruppe deployed on the track behind them (-taking two activations to do so).
1.Gruppe (on the left) moved up just to within sort-of-effective range of the troops by the halftrack, and the 2iC put them on overwatch.
Having decided to fight it out, the Americans deploy their (remaining) MMG next to the SL and blast the Germans on the track (with crazily lucky rolls), killing three and knocking out the JL. Overwatch fire from 1.Gruppe is as poor as the MMG’s was great, inflicting only a bit of shock.
The squad around the halftrack (with a 50-cal!) raise the good rolls by the MMG team by killing six of 1.Gruppe!
The German 2iC is getting a quick lesson in what front-line command is like!

The few Germans left play the crazy-dice-rolling game as well (the dice-gods are suddenly out for blood), killing two on the MMG team and pinning the position.
The Germans interrupt the next American phase in an attempt to break the faltering MMG position, but the odds even out and the fire is ineffective.
The Americans then pile on with more fire, eliminating 1.Gruppe and sending 3.Gruppe fleeing off the table.
The (wounded) German 2iC finds himself in command of only a single gruppe and the rifle-grenade team, with a Force Morale of 2.
Never surrender! Never give in!
The dice-gods give the Germans one more chance to fire on the MMG: They manage to move their last gruppe to the edge of the smoke so that they can fire: inflicting enough shock to break the Americans and send them running back up the track to the rear…with the Recon Platoon Leader!
The American Force Morale is now 4.
The Sturm Platoon (now with the highest morale on the table) continues to duke it out with the American HMG, trading shock but failing to pin the U.S. position.
Critically, though, the CiC finally accumulates enough points to gain a full CoC die, which he uses to end the turn – routing the American Platoon Leader off the table.
U.S. Morale drops to 1.
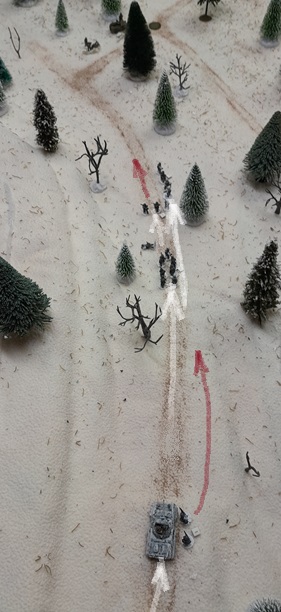
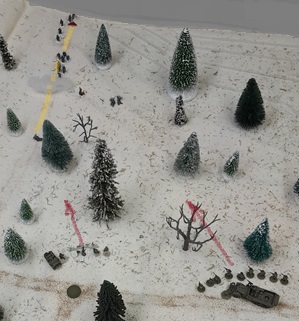
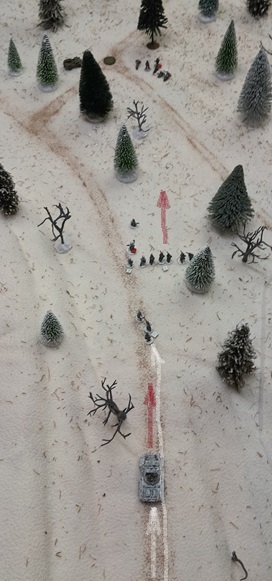
The table at the end of the turn:

— The driver succeeded in starting the armored car and lurched down the track…
The Americans decided to take a chance on the (apparently lucky?) dice and stick it out for another phase.
They (mostly) get what they need: The HMG kills the German HMG gunner (leaving just the JL) and puts shock on the assault gruppe behind – but not enough to pin them. On the other flank, the AI-squad gives the German 2iC his second wound – possibly guaranteeing him a medal (-if they ignore the whole ‘getting most of your men killed’ thing…) -but shocking the men in the gruppe and sending the morale of the Rifle Platoon down to match the American’s 1.
The Sturm Platoon (with their relatively chomping-at-the-bit Force Morale of 6) tries to capitalize on the American’s arrogance in sticking around by putting fire on the remaining HMG position (including a round from the M8’s 37mm – the CiC couldn’t end the fight without shooting at least once!), but the dice-gods don’t play along.
Despite losing two men and suffering a wound to the JL, the Yanks survive unpinned and undaunted, allowing them to order a withdrawal on their next phase.
Final overview at the end of the game:
The withdrawal went off without much drama: There weren’t that many to get away and not many more in eager pursuit.
The halftrack managed to turn around without getting stuck, and the remaining men of the HMG team melted into the woods and made their way to the Jeeps where the mortar section was packing up. The German CiC decided that presenting the captured armored car intact was better than risking it to a Bazooka ambush (-and might ease the poor assessment of his attack?) and so didn’t order his men to follow the retreating Americans with much in the way of vigor.
So: The Recon Troop managed a victory -however costly- while the Germans both failed in their mission to get to Mouterhouse as well as suffered enough casualties to effectively remove the Company from much of a future in the rest of today’s fighting — the remaining men probably count that as a victory.
