Once more unto the breach…
While the bloodied 1st Battalion licks its wounds and regroups, the 2nd Battalion shakes out from its brief rest along the road leading down from the beachhead and moves in to take over the job of clearing the highway into and through La Cambe.
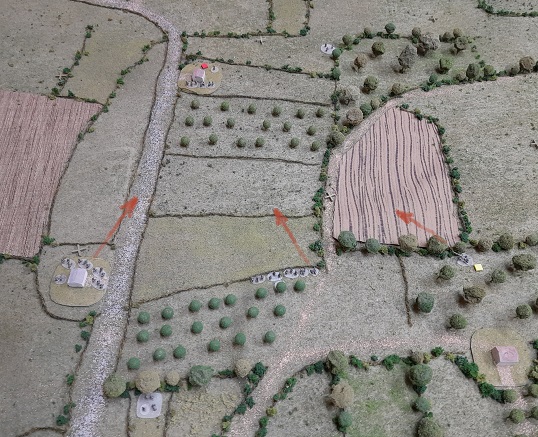
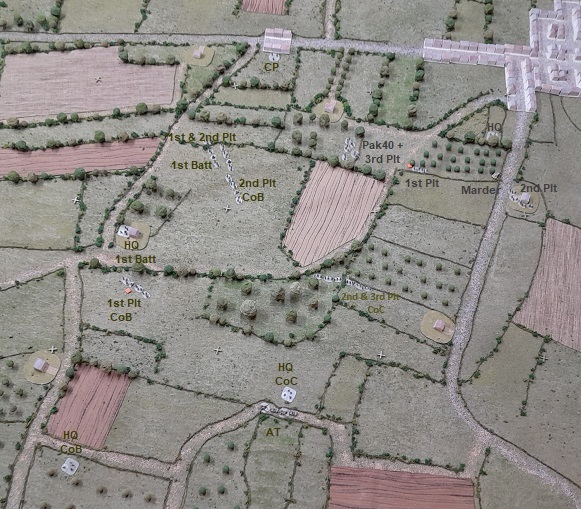
Besides knowing something of the enemy facing them (or at least what confronted the 1st Battalion), they also have the advantage of -in addition to sending units from the eastern edge- swinging some of their force off the march road and attacking over a ridge from the north/northeast of the battlefield. By centering the attack on the northern side of the highway they hope to avoid the flak position in the south. The plan is to consolidate on the much-fought-over-acts-like-a-fortress farm, and then take the German HQ and flak position from the flank/rear.

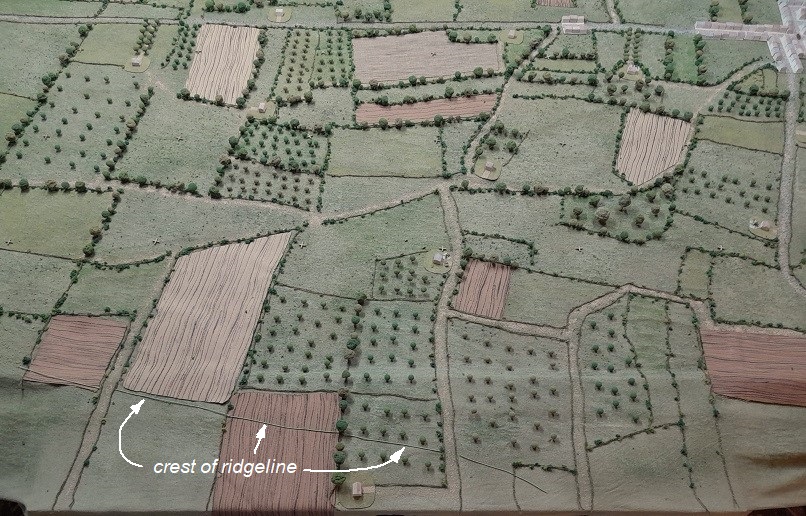
Ideally, the tabletop should be shifted to encompass the approach of the Americans (and allow for the Germans to extend their defense) but…It’s impossible to do that easily with the ‘cloth-over-contours’ method that I use* ( a disadvantage of the system). Luckily, the modern contours show the ridge much closer to (and paralleling) the table edge than the period map, so I can justify making things work!
*see the Game One page for more on the table construction
There is enough overhang of the cloth for a (200×1000-meter) shelf to be added on the north edge that should allow (with a bit of stretching) reaching into the center of the table. The LOS-blocking ridgeline is indicated by the thin wire: this will mark the game’s Start Line for the attackers. Combined with the presence of the orchards, the deployment of forces there will not seem like a ‘magical’ appearance. The Germans are held to not risk an extension of their perimeter beyond the ridgeline – an assumption that can be justified (I think!) by the size of the force available to them. It’s not an ideal workaround, but it will have to do.
The American Force
To beef up the power of their attack, the 2nd Battalion has secured the attachment of 1st Battalion’s Company C to its command: They just sat on the sidelines waiting to move in during the first attack, and letting them continue with those same orders seems the right thing to do. It’s hoped that providing a share of the victory will help the morale of the 1st Battalion’s men ( -it will also allow the American player to roll ten Command Dice!).
The Regiment’s artillery battery is still tied up somewhere between the beach and here, so it will be unavailable and the Battalion will have to make do with their 81-mm mortars (with their limited supply of rounds) for indirect fire support.
As for any armor support: Col.Goode is not at all pleased with what happened in the first attack and has refused the use of the other Company of Shermans. At the time of this attack’s start, the remnants of the first tank Company (3 sections + HQ) are still recovering and sorting themselves out, but are eager to avenge their losses and promise to join the fight as soon as they are ready.
As some good news, two of the Regiment’s Anti-tank sections have made their way down the road. The Battalion’s own AT section is on hand, as well, so -while the 57mm guns are not impressive individually- when combined the Americans will have a dozen HE firepower dice to throw wherever the attack needs to remove a stubborn bit of defense (…like at a thinks-it’s-a-fortress farm, perhaps?).
Flt.Lt.Mulligan (or his Squadron mates) may not be seen as much in the coming fight as there’s a rumor spreading that Col.Goode was so flummoxed by the attacks on the tanks that he’s sent a complaint up the line demanding that the planes leave the area around the highway alone and to quit interfering with his battle. Events will show whether his message had any impact.
The German Force
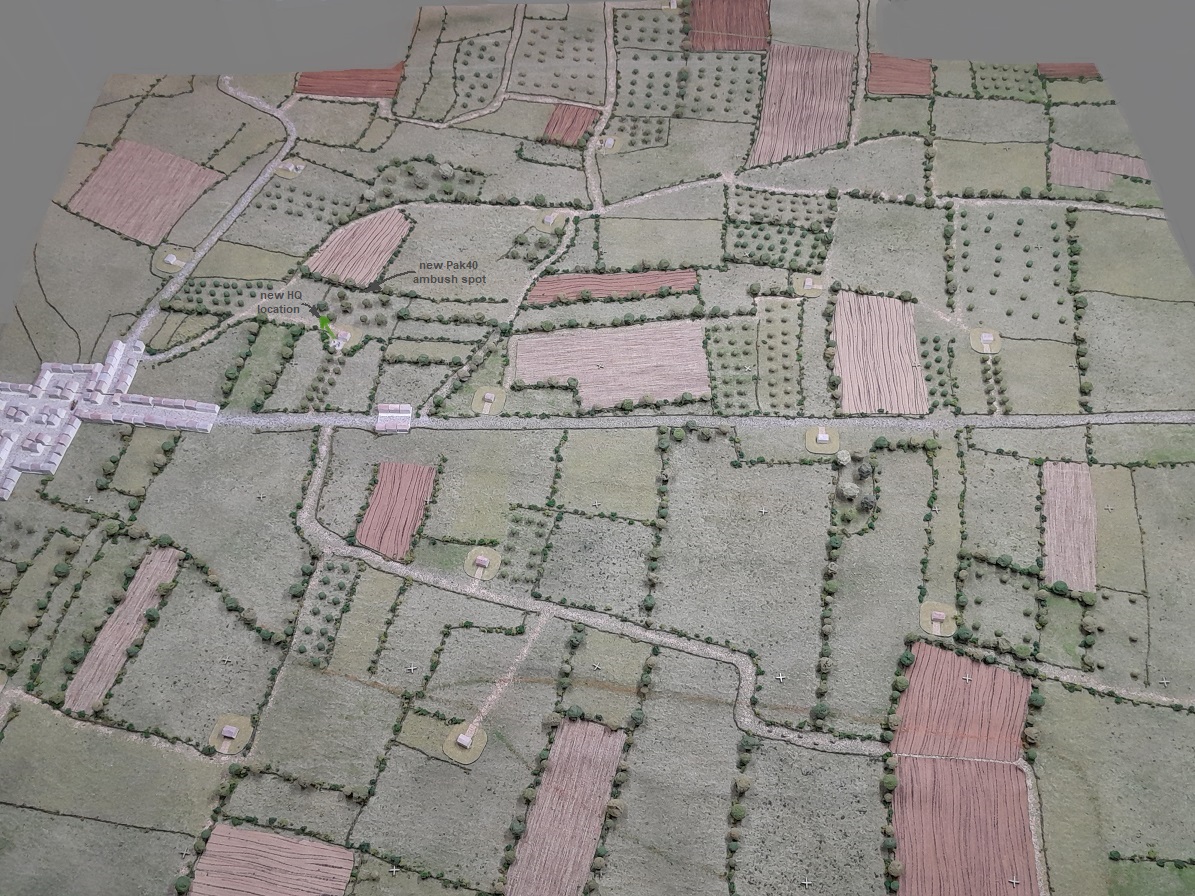
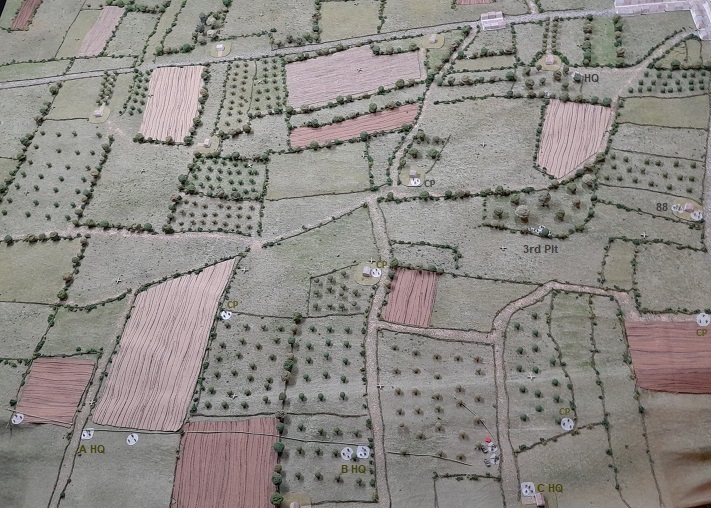
For the Germans, knowing that the beachhead is to the north means that seeing an approach by the Americans from that direction will not come as a surprise, and they will be allowed to shift their forces accordingly during the initial set up for the game. The CO has moved his HQ out of the Abbey to the southwestern corner of the adjacent wood and shifted the Pak40 to the wood’s northern edge to the west of its last position (making both out of sight of that distant farm on the hill that makes a commanding-view lookout point for an American artillery observer…).
The single fit-for-duty section of the 1st Platoon has been rolled into the 2nd, which joins the full-strength 3rd Platoon to form the bulk of the defense – sure doesn’t sound like much, but…the two surviving MG sections have been formed into a Platoon that -in the right place- can cause a lot of damage, and the plan is for the Marders (who report being on the way) to quickly fill in any gaps/breaches that arise (and hopefully give the Yanks a bit of a surprise!). The 88 on the south side should do well enough holding off anything that comes that way until…well…there aren’t any reserves to send that way, so: Until a withdrawal can be organized (I wonder if a Marder can tow an 88?).
Not the best plan, but if the Americans can be held off for another hour…or at least until noon?…the German player will count it as a victory, and hope to use the time gained to create a strong stand (with, hopefully, two Companies instead of just one) further down the road.
As observers report seeing the soon-to-be-attacking Yanks to the north, the welcome sound of armored vehicles coming up from the south is heard. Unfortunately, only two Marders drive into town – they report that the platoon was hit by Jabos while crossing the inundated area on the exposed highway and these two are the only survivors. This is a bit of disappointing (though not surprising) news, but even a single section is a welcome addition to the garrison. (NOTE: per the rules -I think?- when the Germans wish to deploy the section -if not as an ambush- it will arrive on the road/table edge just to the south of town.)
Per discussion on the TFL forum- the Germans will see the number of their Command Dice reduced to seven = something that would have had an impact in the first game (where they rolled eight), but…so it goes: live and learn.
A larger impact will result from the fact that my opponent was unable to play this game (some silly excuse having to do with kids/job/house – the usual annoyances of reality…) so it was done solo = not ideal for these rules, imo, especially as -with only a single game under the belt- the lack of experience attached to handling both sides will make mistakes/poor tactics even more prevalent, so: Be prepared for more than the usual teeth-grinding as the AAR is read…
Game Two: Second attack on La Cambe
The Americans have decided to simply overwhelm the defenses with sheer numbers, and so deploy all three of the 2nd Battalion Companies on the northern edge (A, B and C from left to right). The 1st Battalion’s Company C is in reserve, and the commander of the recovering Tank Company has sent word that he will bring three sections of Shermans to the fight within the hour.
The battle is slow to develop as the first turn sees both sides having difficulty getting units onto the table. (House rule/adaptation of the effect in rolling ‘1s’ in the initial deployment phase of the game, as no artillery is present.)
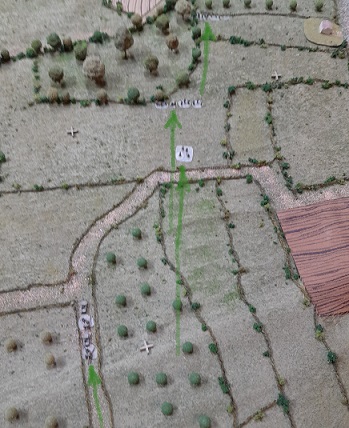
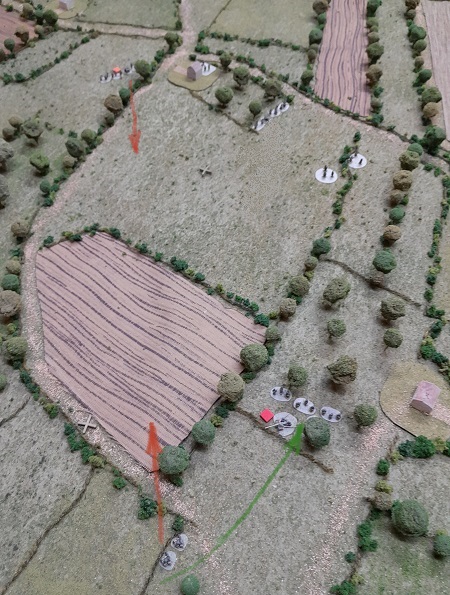
On the right flank, the Regiment’s two anti-tank sections (attached to Company C) move around the nose of the ridge and emplace on the hill (which is at the same height as the one the 88 is on) at the edge of the orchard. They trade fire with the flak position, each inflicting a point of shock.
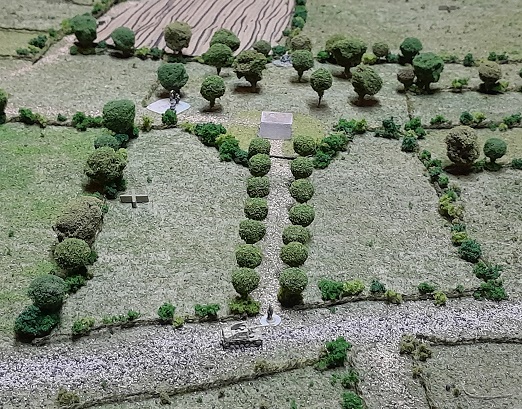
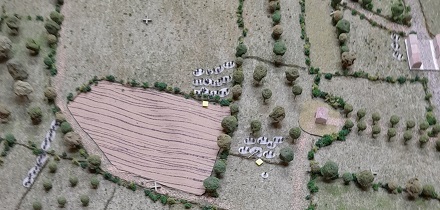
The Americans deploy a CP (shown in photo with ‘X’) to the flank of the German position.

In their phase, the Germans deploy the 3rd Platoon into the edge of a woods and try to take out the AT position, but only manage to inflict another point of shock.
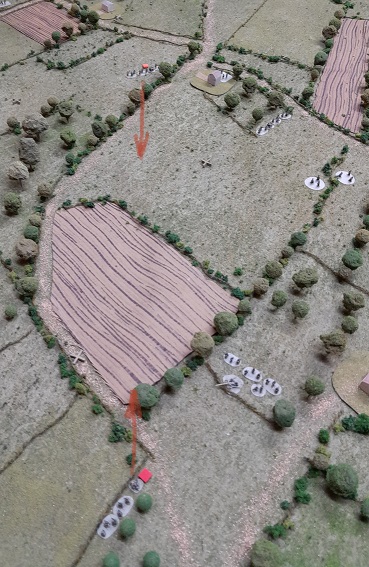
The first deployments:
Each of the American Companies has placed a CP well forward. (Note: I think placing the others at the Start Line at the beginning was a big mistake, as they must now advance by orders rather than simply being deployed out to 18″ from the HQ…oh well – I did say this game was going to be full of mistakes!)
Company B in the US center becomes hesitant, but that has no effect on the action on the right as the 57mm guns and freshly-deployed 1st Platoon of Company C take out the flak gun.
The German rifle platoon in the woods manages to suppress the AT platoon, but the Americans will happily take that sort of trade all day.

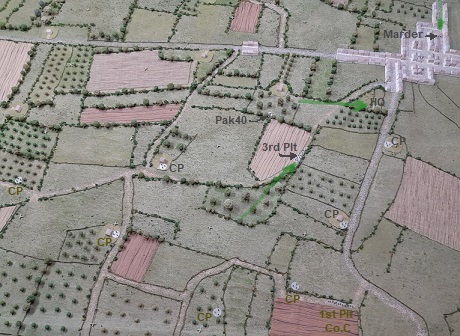
The Germans regroup a bit, moving the 3rd Platoon (which had taken some ineffective fire from the Company A mortars) back from the woods and shifting the HQ to the west. The Marders finally manage to show up and will (hopefully) make their way through town quickly.
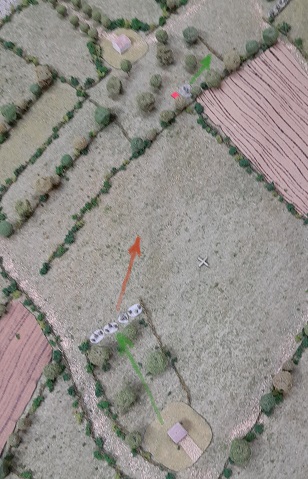
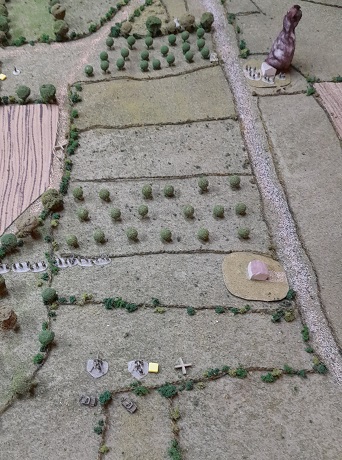
On the following turn Company B is back in the game. A Platoon deploys into the farm (where the 57mm AT section was last time) and fires at/removes the German CP in the farm to the south.
The HQ then moves up, allowing it to deploy a CP into the BUA -and, just like that, the ‘fortress-farm’ of the first battle is taken.
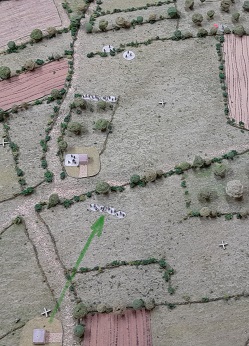
On the right, the Company C 1st Platoon pushes up into the farm where the 88 was located while a CP advances beside it.
The German platoon react-withdraws to the orchard, where they come under fire by the Americans (under prompting by the Company HQ) and suffer a point of shock.
The German 2nd Platoon deploys into a neighboring BUA and joins the 3rd Platoon and Pak40 in taking out the US 1st Platoon.
The loss reduces the number of US command dice and reminds them that -while their mission is time-sensitive- pushing too rashly is not the best way forward.
The Panzerjagers make their way slowly through town, while a section of the 1st Platoon (wounded in the first battle) is deemed fit-for-duty and heads over to HQ for orders.

Taking the lesson suffered by their 1st Platoon to heart, the rest of Company C advances cautiously in cover while the HQ moves up to direct the attack.
The AT guns are told to limber up and join in.
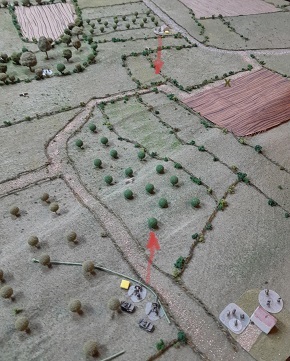
In the center the Company B CP moves out of the farm to the edge of the woods where the 2nd Platoon deploys and takes the Pak40 under fire – prompting it to withdraw to the west.
With the ‘fortress’ farm secured, Company C of 1st Battalion gets to act on their (hours old) orders to consolidate on the position, sending two CPs to the crest of the ridge, while Company B’s 1st Platoon moves up.
In response, the German 3rd Platoon shifts to the woods to support the Pak40, while the MG Platoon position in the orchard is revealed/deployed and takes the advancing Company B men under fire. The exchange ends up very much in the American’s favor as they only suffer two points of shock while taking out one of the MG sections.

The German shuffle continues with the two 1st Platoon sections heading to support the MGs and the Marders making their way to the edge of town.
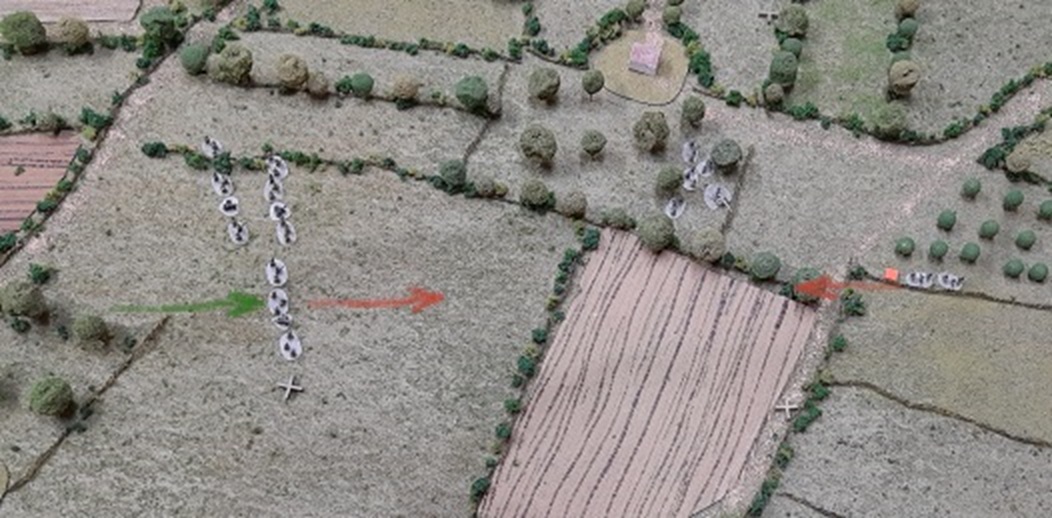
Situation at the end turn four:

A half-hour has passed, and the German Commander is looking at his watch and thinking that his “hold out til at least noon” worst-case plan looks to now be the best he can hope for.

The Germans win the initiative on the next turn. They get the 1st Platoon into position with the MG section and move the Marder into the corner of the orchard.
The MG section again trades fire with the Americans, and again comes out short in the exchange as the Germans end up KIA.
That’s a huge loss in two quick turns, and the German’s defense looks quite a bit shakier than it did just a few minutes ago.
With the firepower facing them reduced significantly, the 1st Battalion deploys two platoons while the 2nd of Company B advances and fires at the German 1st Platoon, dealing out two points of shock while suffering no effect from the return fire.
Company C continues its advance on the right: Both platoons are in line/cover and the AT guns have driven up to the HQ for their next orders.
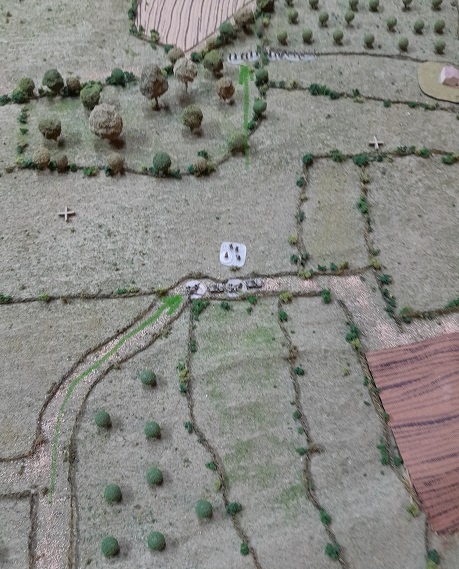
Situation at the end of turn five:
It’s now past noon, and after a quick assessment of the situation the German Commander -having won the initiative- decides that he’s done enough and orders a withdrawal. The too-quick loss of one of the 88s and the MGs seriously reduced the strength of the defense, and it’s doubtful the town could be held for much longer against the forces now arrayed in front of them (with lots more coming up!). Thankfully, the Jabos and tanks haven’t shown themselves, so it’s hoped that a good portion of the men can make their way back down the road to Arthenay to reinforce the position there.
That’s the official game result/ending, but…since the toys are on the table, I decided to play out things before tearing everything down.
The result of playing it out just for fun…
The Germans put the 1st Platoon in the woods with the 3rd, but it’s not enough to withstand the assault by the 1st Battalion’s Company (which deployed its 3rd Platoon over by the outskirts) and the 2nd Platoon of Company B. A (not too bloody) close assault was diced out which saw the Americans taking the position and sending the Germans fleeing back through the town.
On the right flank, the AT Platoon set up on the hill and won the contest with the Marder section, while the Company C Commander was reminded that he could call in missions from the Battalion mortars and proceeded to drop a couple of barrages on the farm. (read: the stupid player completely forgot about that, but the official position is that the Green Captain screwed up!)
The German 2nd Platoon there survived, but seeing the Marders destroyed and the rest of the Company running into town would decide their course of action…
The situation at the end (if the Germans had stuck around):

Right after the 1st Battalion troops routed the Germans in the wood, the US Tank Commander rolled up with three sections of Shermans, the appearance of which will influence the success of the German withdrawal as it was ordered ten minutes ago (prior to the ‘jfl’ play) – the chief result of which was the destruction of the Marder section as it tried to make its way down the highway to Arthenay.
Time to take the table down and set up the next one…
