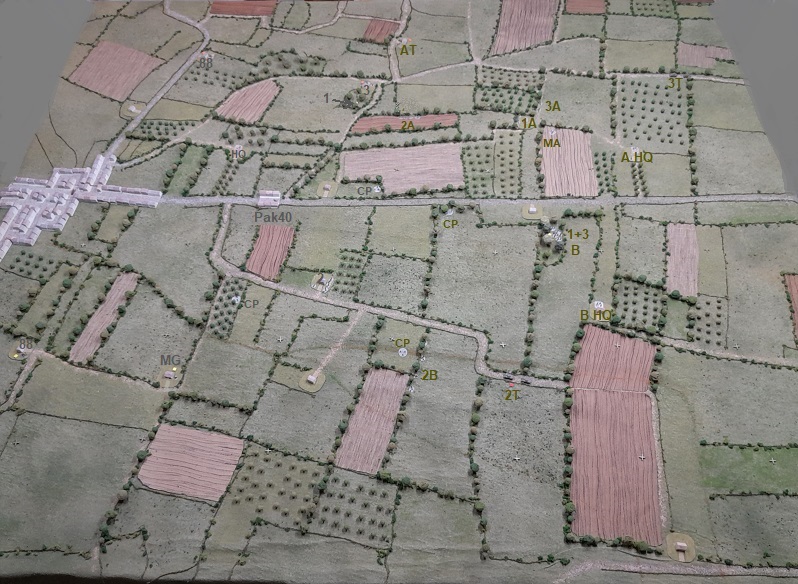
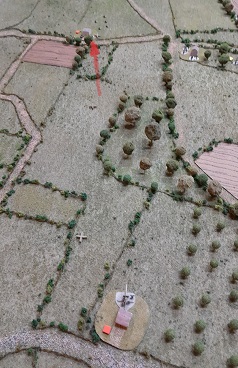
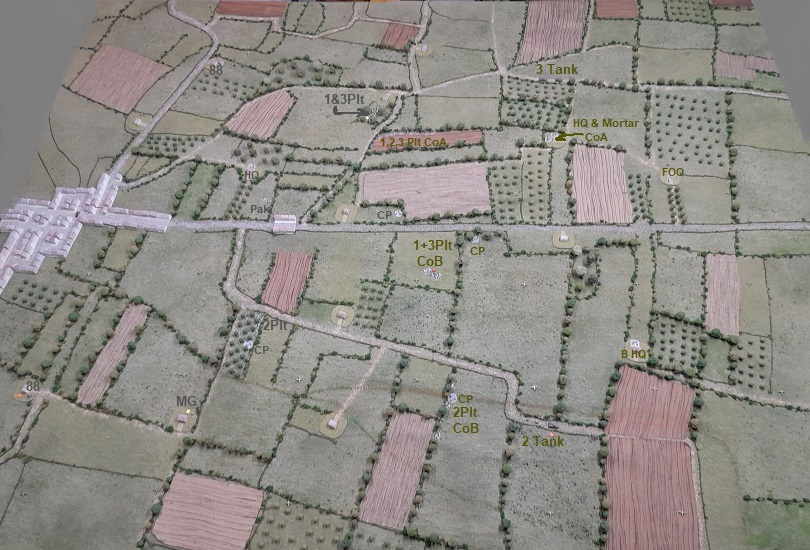
The American attack begins with the advance to take the town of La Cambe.
Notes on table construction:
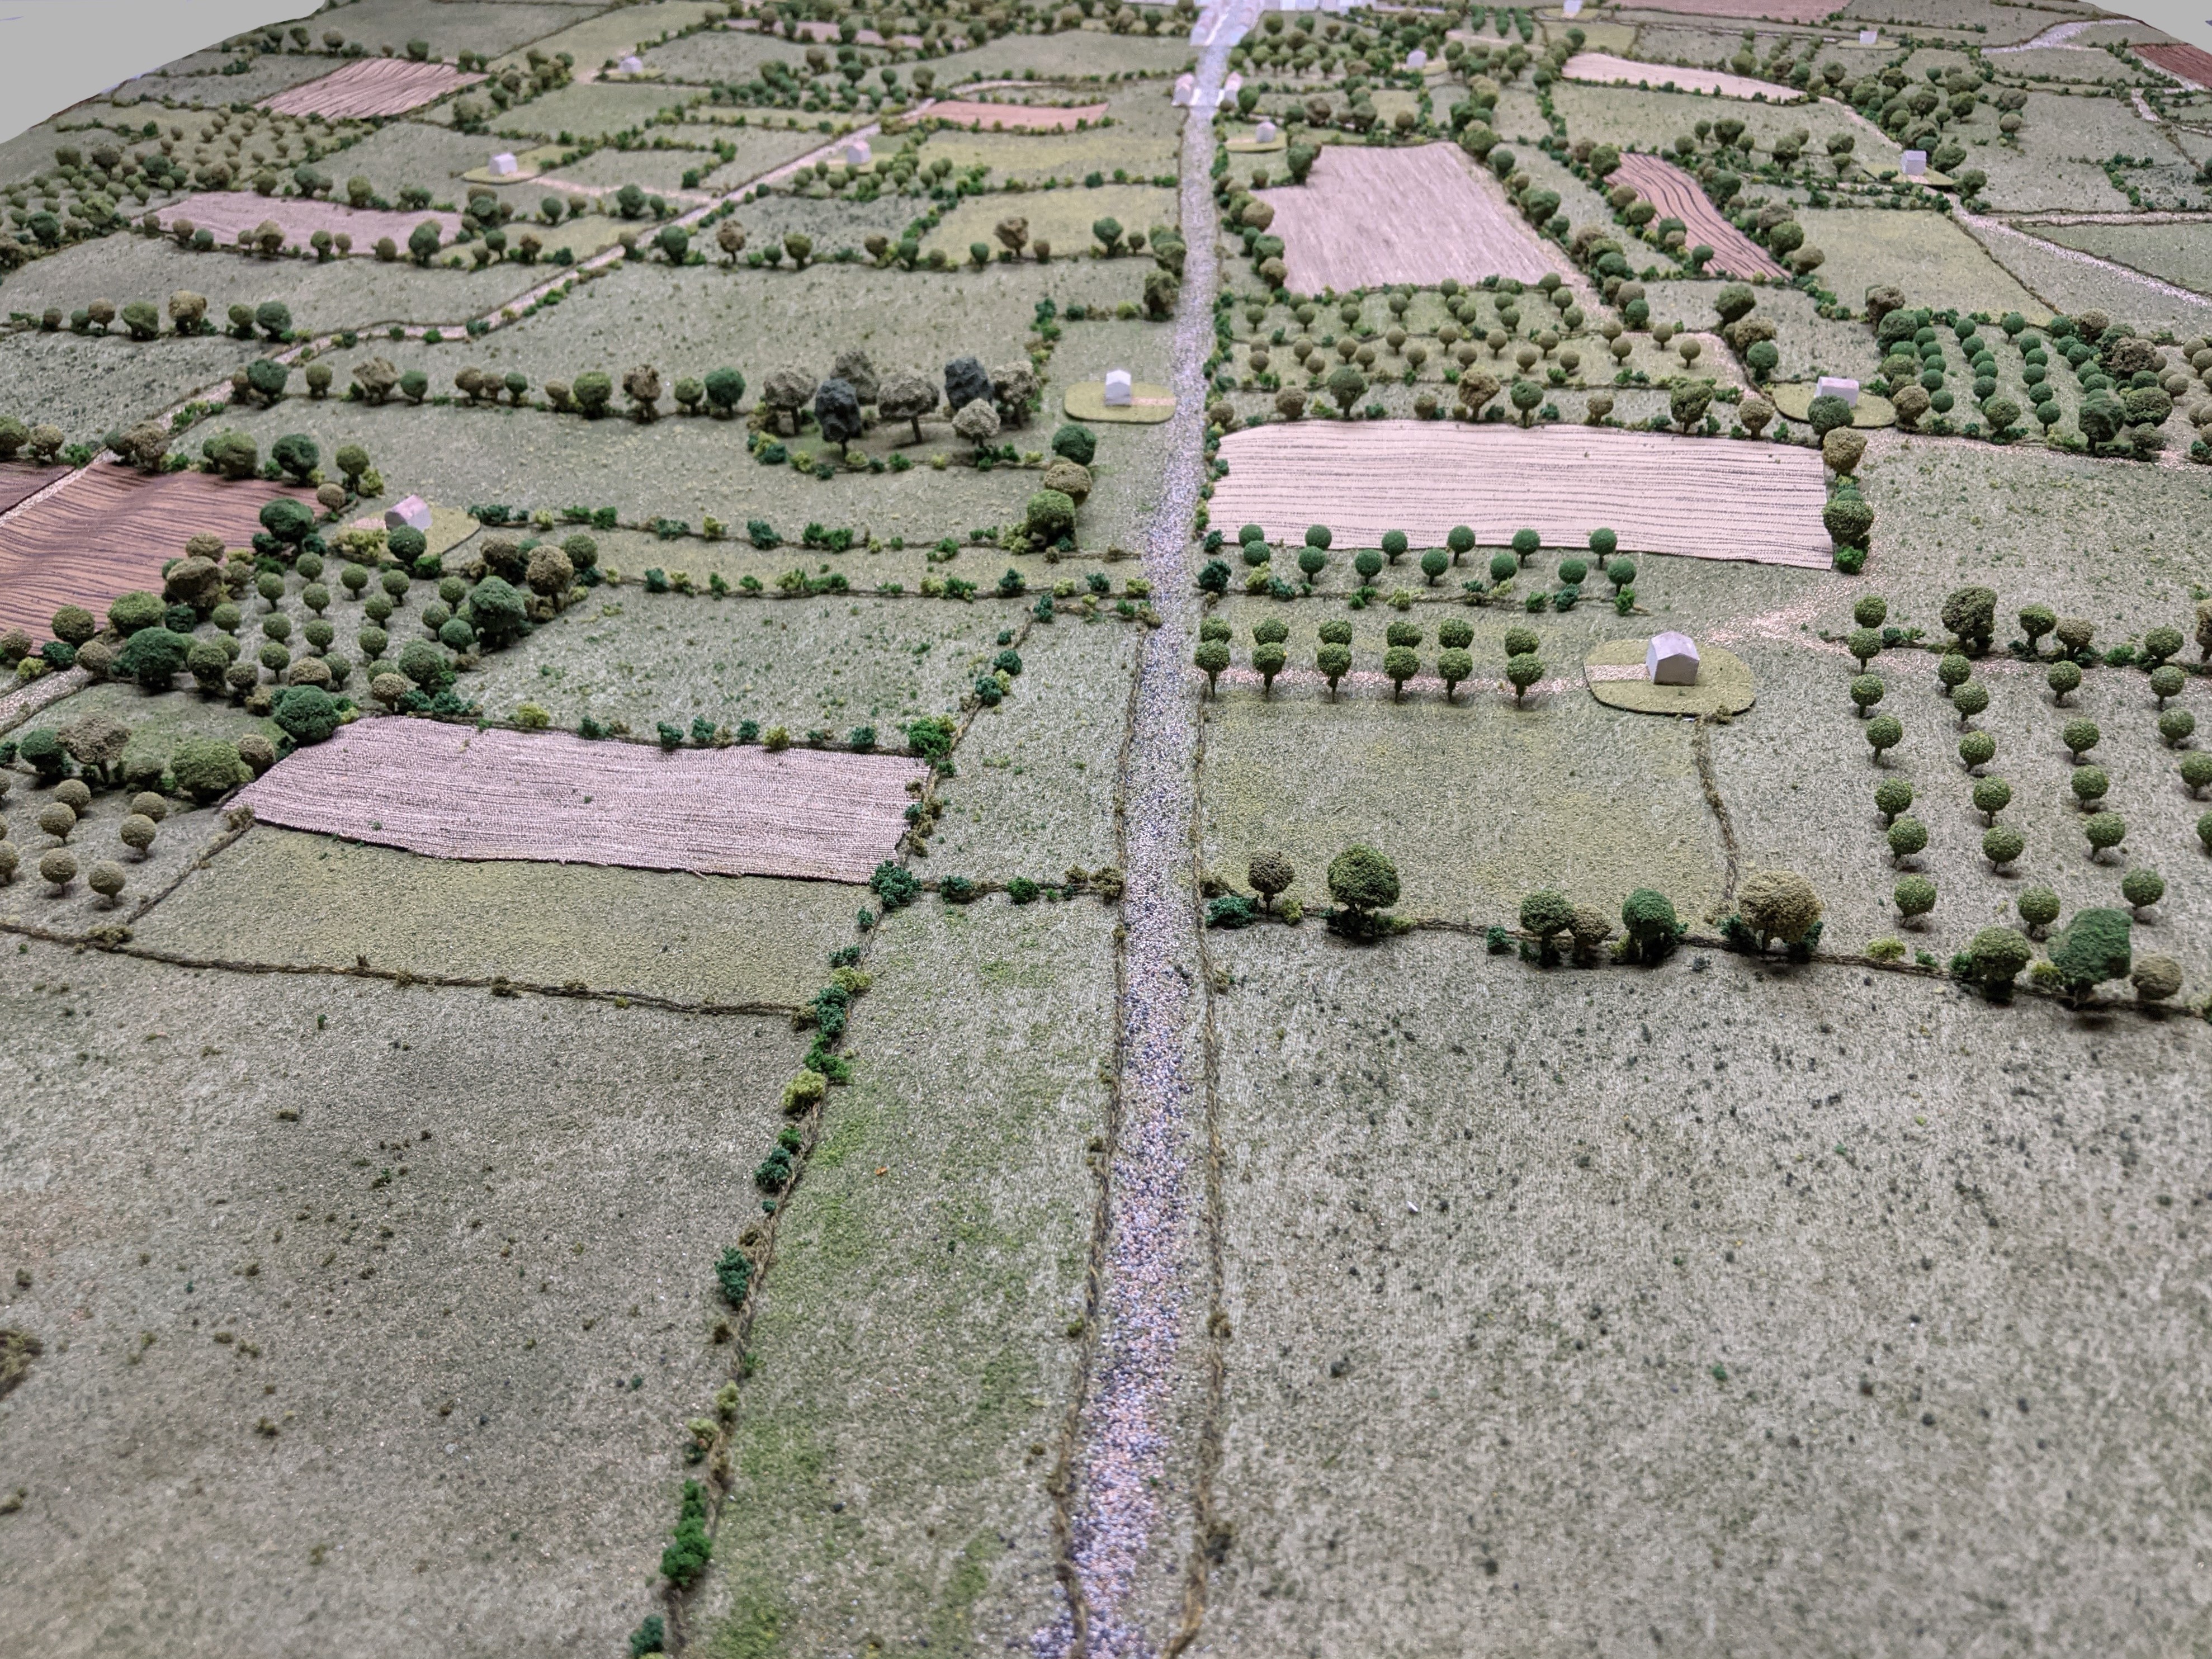
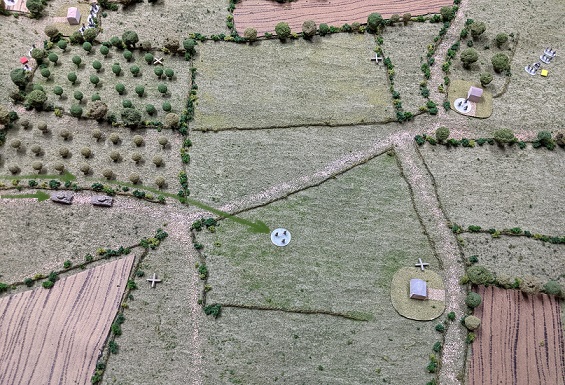
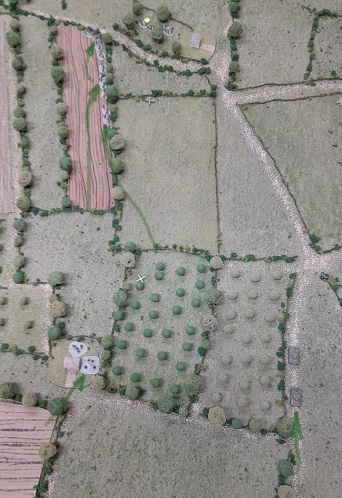
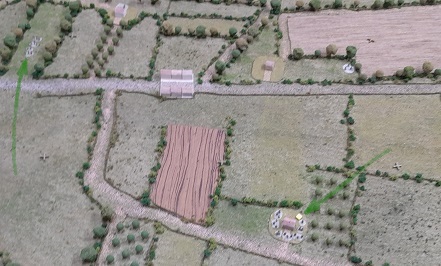
As lately done with (most of) my games, period aerial reconnaissance photos (from https://ncap.org.uk/)
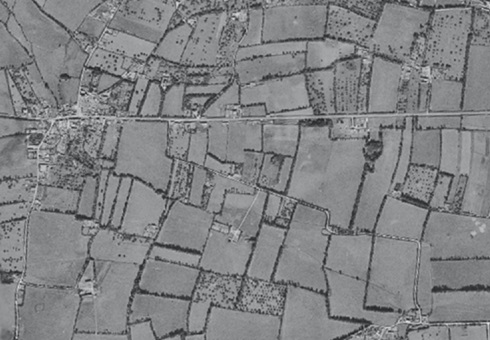
…and contours (5-meter elevations obtained using Contour Map Creator, done with 6mm foam sheeting) were used to construct a reasonable facsimile of the terrain on a 70″ x 80″ table – no claims are made as to its accuracy, as much of what was done was driven chiefly by what I had to work with…and thought looked neat!
While the table presents a certain amount of difficulty in manipulating units in its center (for one of my limited reach…), I feel it is a price worth paying in order to provide a depth and frontage (for both the attacker and defender) of over a mile. This, along with the use of 1/300 figures, presents players with a better impression of the space involved (imo) than using larger figures/terrain to model an engagement of this size.
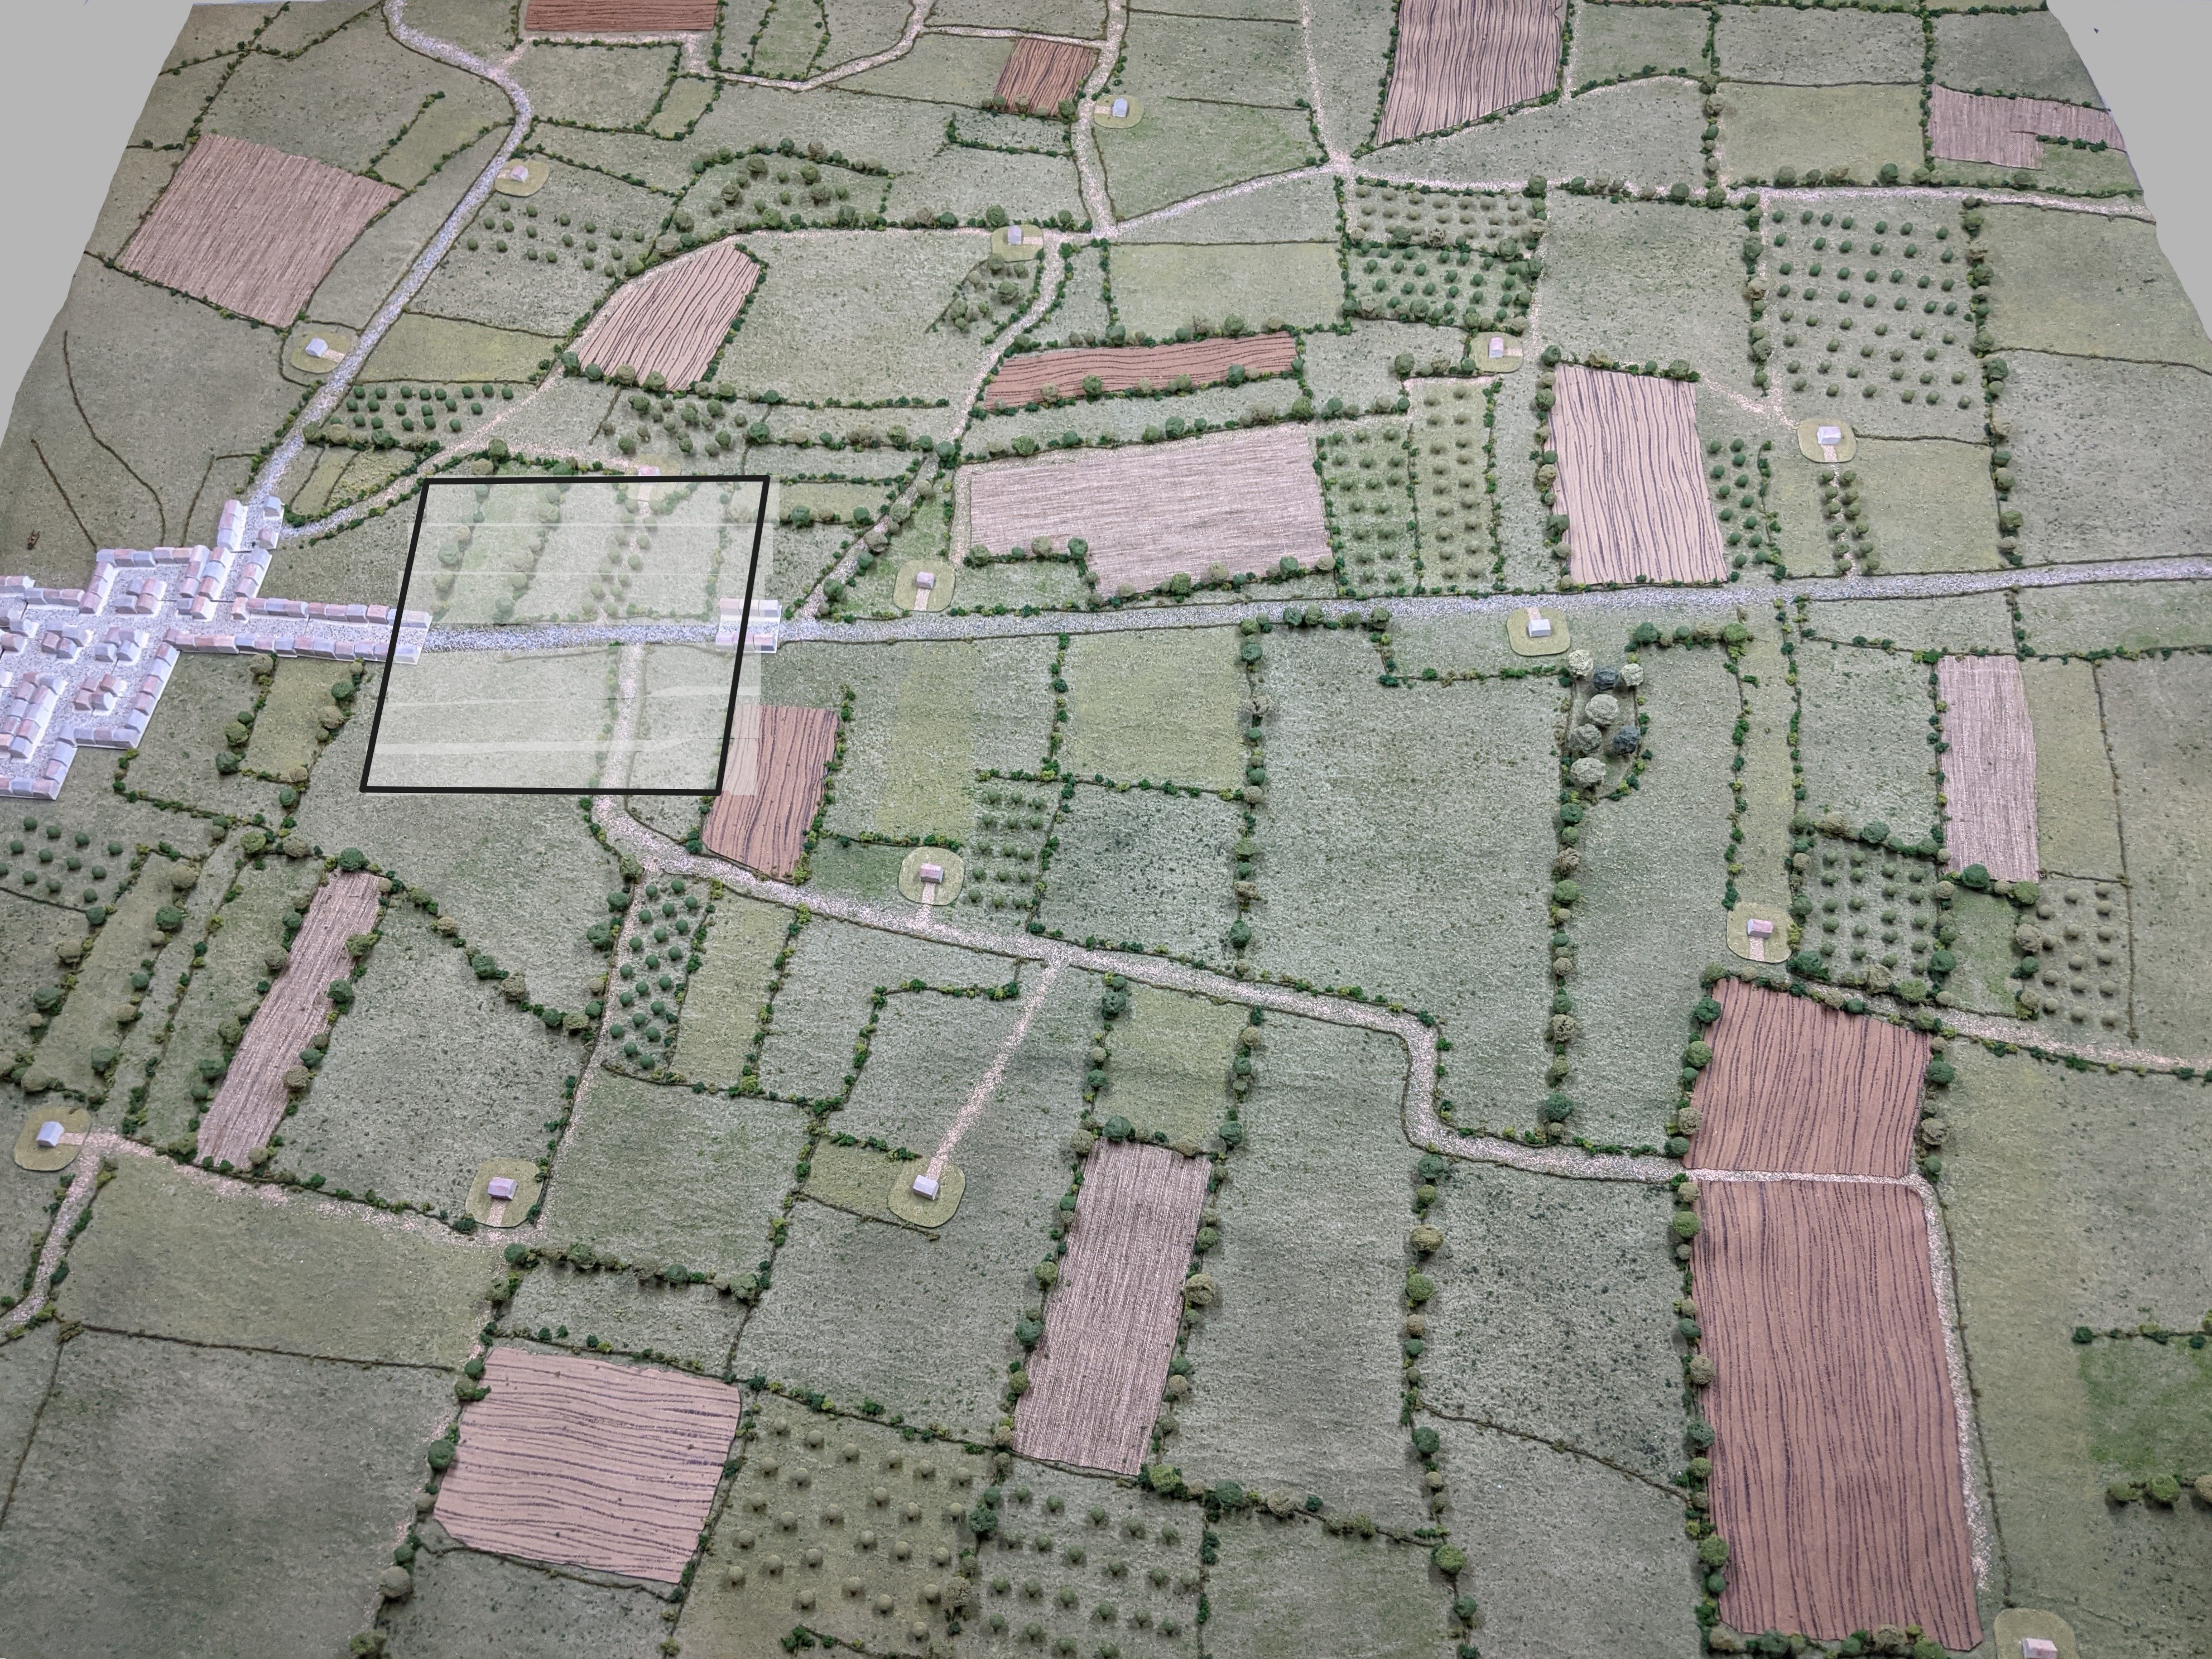
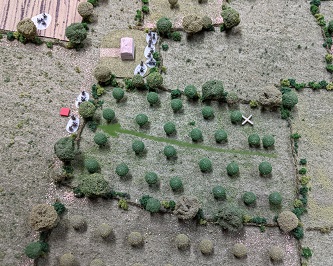
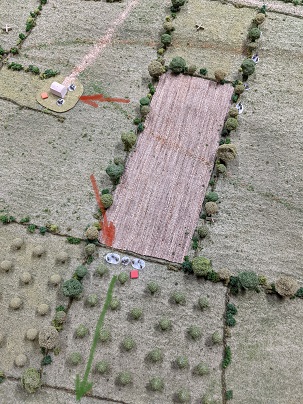
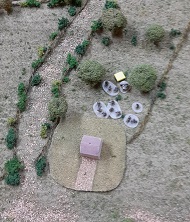
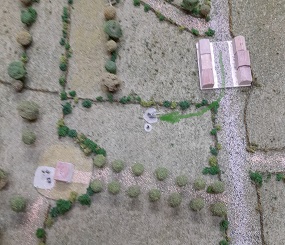
(Terrain notes: The BUAs are simple foam/cardboard mockups to test the concept/design before going to the trouble of printing/building/painting similar units. Similarly, the hedge-lines are just slapdash yarn+foliage laid out that is far too easily disturbed by the play of the game to be a decent solution -I plan to come up with something better in the future…I just wanted to get some toys onto the table!)
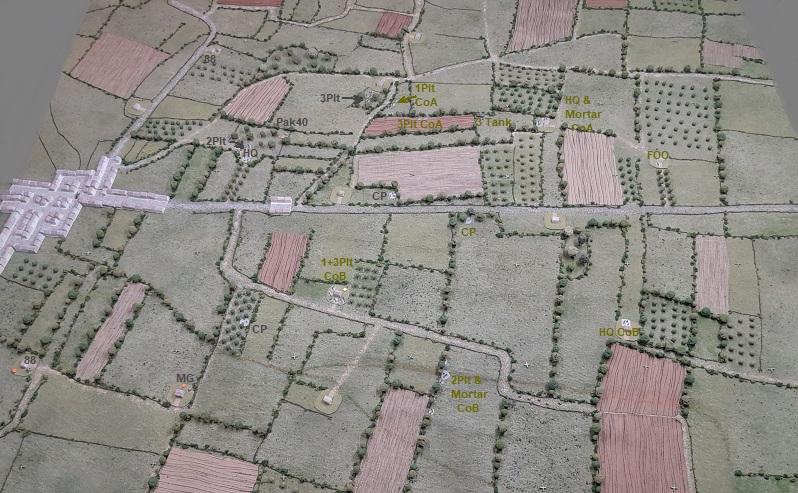
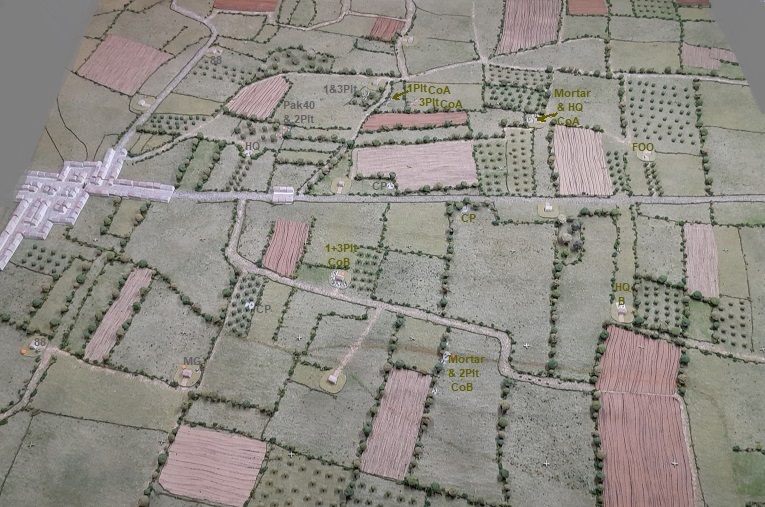
The Germans will defend the town with a regular Heer Company (HQ, 3x rifle platoons, MG section, and a Panzerschreck team). Their (very welcome!) supports include a Machinegun platoon (2 sections), an Infantry Gun section, an extra Panzerschreck team, and a Pak40 AT gun section.
The help of the latter two against the expected presence of American tanks is augmented by two 88mm Flak sections. While the locations of the powerful guns (in hilltop farm BUAs north and south of town) are not set by the player (being placed simply on the basis of best-guess AAA positioning within the scope of the area without consideration of their ability to engage ground targets) they are hoped to play a significant role in blunting the impact of any attacking armor.
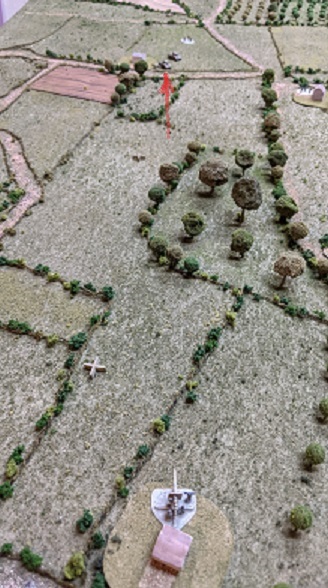
There’s a ridge running just north of the highway that effectively divides the battlefield in two. The ground to the south falls off significantly from that point.
NOTE: The AAR was built up over the course of a month of sporadic play, so no surprise should be felt in encountering inconsistencies in presentation and/or writing style. I have a lot of respect/admiration for gamers that make beautiful, well-crafted websites that gift the gaming community with their reports of tabletop-action – this is not one of those! I concentrate more on self-deprecation… ; )
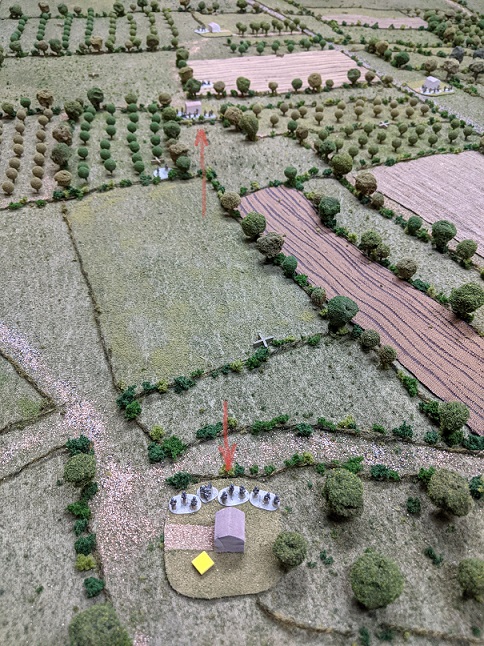
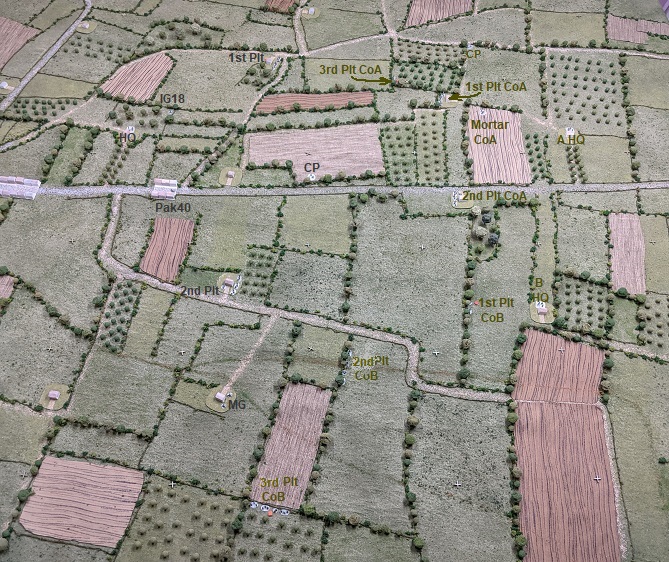
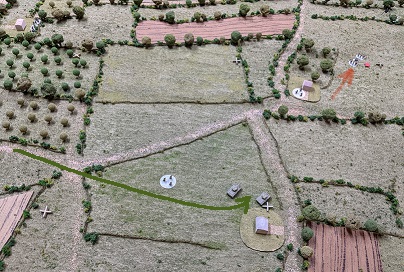
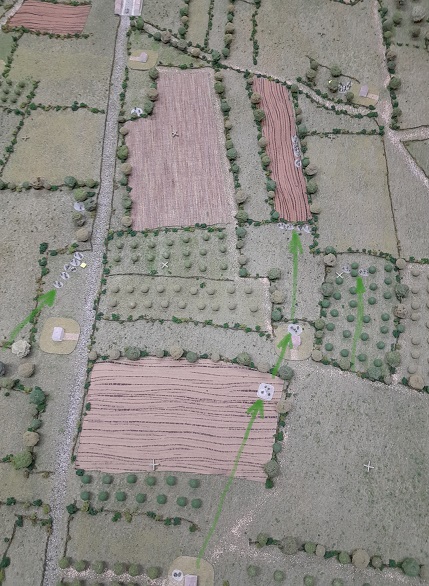
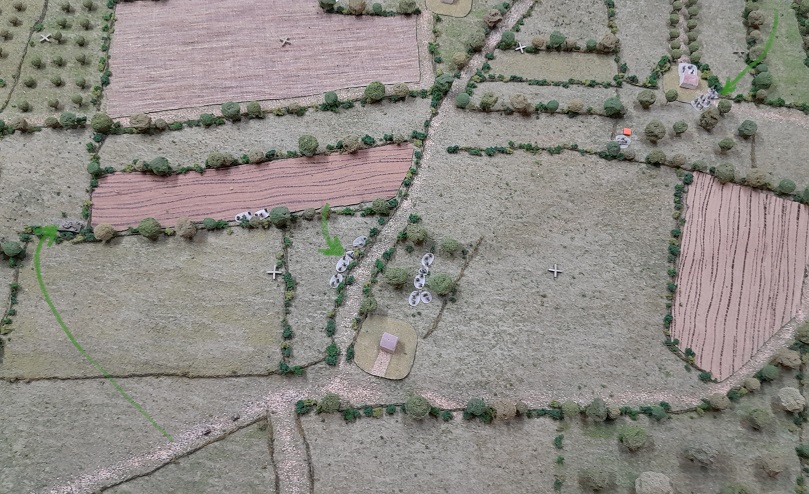
The game begins with the American 1st Battalion deploying two companies. Company A -ordered to attack on the north as well as to control the highway- establishes its HQ (along with the Battalion-Mortar FOO…I just forgot to place the figure!) in a farm on a high point of the ridge near the baseline table edge:

…while Company B is charged with advancing across the fields to the south:
(The somewhat harsh overhead lighting did much to disable the ‘see-through’ nature of the thin, clear bases — but they show up better on the webcam which aided online play…at least that’s what I’m telling myself! The small crosses are 10″ markers to help remote players navigate the table.)
The Americans hold Company C and a supporting Tank Company in reserve.
The German Company HQ was ‘hesitant’ on the first turn, so there was no reply from the defenders.1
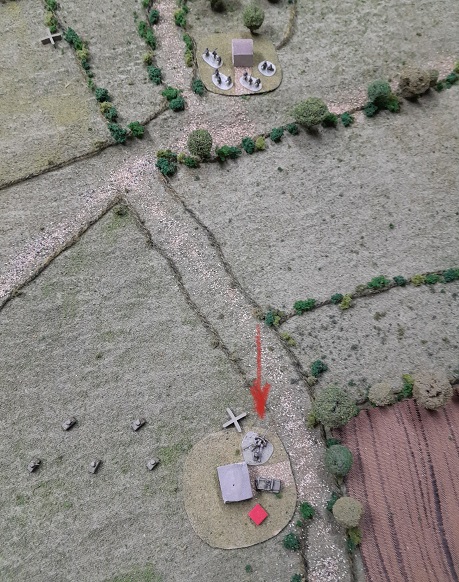
The second turn sees the Americans continuing to advance. The first response occurs as a Pak40 in the outskirts of the town fires (to no effect) on an American platoon that had moved up to a treeline south of the highway.
More (ineffective) fire comes from the Flak battery situated south of town that takes a potshot at the Co.B HQ in a farm.
(Yes, keeping the position secret until the tanks came would be the better play, but perhaps the German thought they could scare them off with just its presence? The official story will be that the rear-echelon flak troops just got nervous.)
On the north side, the German 1st Platoon (w/attached MG) deploys into a farm (which happens to be the objective of the US Co.A) and exchanges fire with the Americans (also with an attached MG) occupying a similar position across the fields. Once again, the German fire is ineffective, while the Americans inflict a point of shock on the Germans.
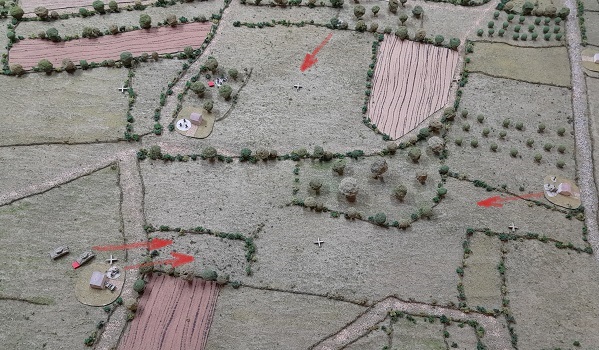
An overview of the battle as the second turn ends:

On the next turn the American Company on the north side (Co.A) is ‘hesitant’, and the Germans win the initiative. Their 1st Platoon in the farm rallies off its shock and fires at the Combat Patrol in the near corner of the orchard across the field but fails to score any hits.
To the south, the American 1st Platoon (Co.B) is shot up by the Pak40 and 88 (in this and the following turn) so that they spend most of the time suppressed.
Two rallying attempts (and help from the Company HQ) manage to keep the platoon from disintegrating completely.

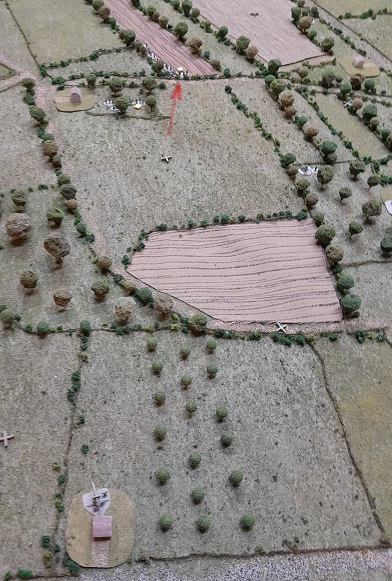
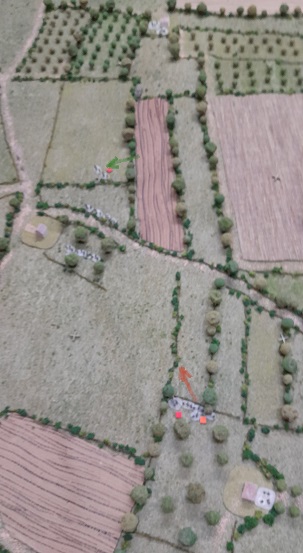
While the German guns pummel the 1st Platoon, both sides move Combat Patrols up. The two shown with a single arrow deploy platoons during the regroup phase at the end of turn 3: the Germans into the farm in the upper right and the Americans to the field’s corner on the left.
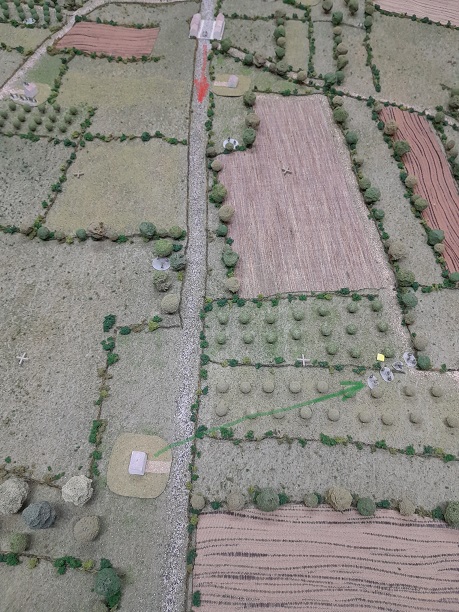
The American 3rd Platoon crosses the hedgeline and lines up on the edge of the orchard to fire at the German 2nd Platoon in the northern farm, but scores no hits.
The Germans deploy a Machinegun Platoon into the nearer farm and fire on the Americans – inflicting 2 points of shock. The return(react) fire is ineffective.
At the end of the turn the Americans deploy their 2nd Platoon (w/ attached MG) to the treeline next to the road.
To the north the fight over the American’s objective heats up.
They pour fire into the Germans from the newly-deployed 3rd Platoon in the orchard, the 1st Platoon in the farm, the mortars in the field behind, and a strike from the Battalion mortars.
The Germans are very lucky to suffer only two points of shock in the ordeal.2 They then turn around (using reactfire) to inflict two points of shock on the American platoon in the orchard.
In the German phase, their platoon rallies a point of shock off and continues to fire into the orchard, suppressing the platoon there while suffering no effect from the American return(react) fire. (The dice are very much against the US player this turn!)
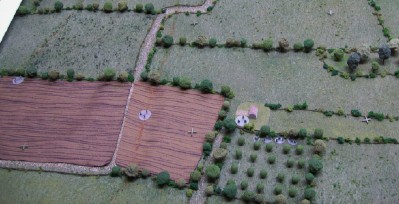
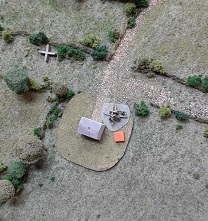
Leaning into the good fortune, the German player reveals/deploys the IG18 gun placed on the wooded hill just behind the Abbey and fires into the orchard, taking out the attached bazooka team.


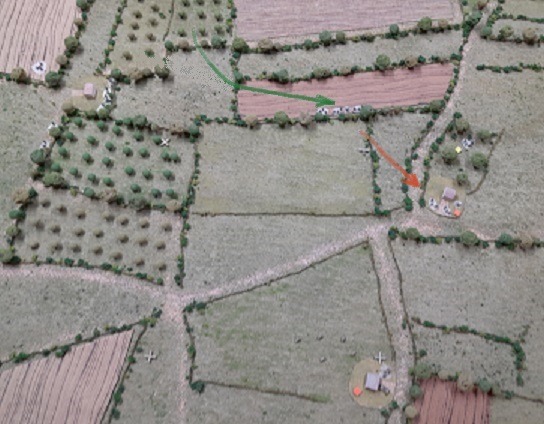
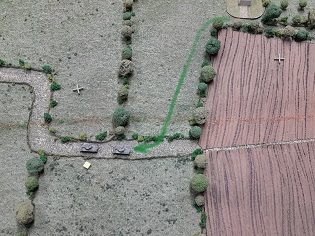
In the middle of the battlefield, the Germans had deployed a Combat Patrol into the field alongside the highway and attempted to run it across to the small woods on the other side to deny its use by the attackers, but were prevented by opportunity fire from the American platoon (2nd, Co.A) in the farm to the east.
The Germans redeployed the patrol at the end of the turn (regroup phase) to perhaps have another go next turn…?
The situation at the end of the fourth turn:
The North becomes too hot for units on both sides of the firefight. The Germans in the farm rally and fire, taking out a section of the American 3rd Platoon, which withdraws to the other side of the orchard.
Then it’s the German’s turn to feel the pressure…and get a little movement in to stretch their legs. A timely visit from Company HQ to bolster their morale made it so that they were in a condition to survive the fire from the American’s 1st Platoon and Company mortars, but decided to follow the Adj. back towards HQ (or maybe just to pay a visit to the gun crew?) instead of stay in the farm as the chief/only target of all those Yanks.

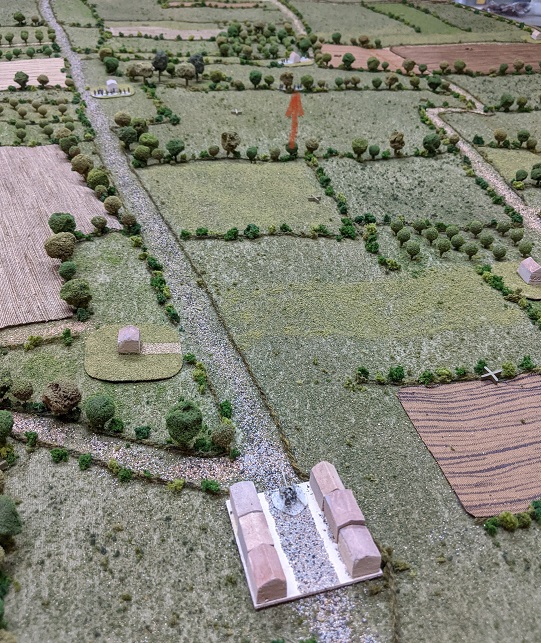
The Americans decide that plans (which were to occupy the farm/intersection that was held by the German 1st Platoon before committing the third company and tanks) are for losers, and call up some armor support to help them push forward.
A platoon of Shermans comes motoring up the track on their right at ‘full speed ahead’.

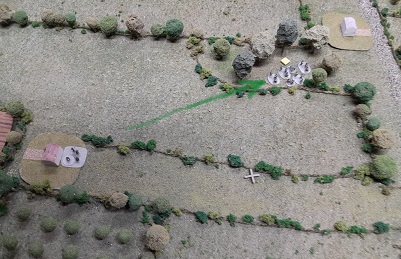
The German Adjutant hears them and sends the 1st Platoon back towards the farm with a few stern words about duty – a Combat Patrol had been deployed into it to keep the Yank patrols away (and had received a bit of fire for their trouble). As the tanks move closer (squeaking by just out of sight of the IG18 gun), a patrol heads for the farm to the north of the contested intersection:
The battle in the south sees its own share of death and retreat as the German MG platoon sends the Yanks in the orchard back into cover with fewer men, while it suffers itself from fire by the Americans in the treeline to the east.

The exposed position of the MGs is rendered untenable by more fire from the treeline and a barrage from the Battalion mortars. The surviving section runs back to a neighboring farm (where they should have been in the first place?) to regroup.
With little else to do, the Pak40 AT and 88 Flak guns continue to beat up on the poor 1st Platoon that has spent most of the game cowering in the treeline in front of the Company B HQ. They’ve lost a section, but have bravely stood their ground – still…where are those tanks?, they must wonder…I can hear them to the north.

So that they don’t feel slighted, the American commander sends the company in the south its own platoon of Shermans to help move the attack along.
…and just because it’s been waiting all game for the opportunity (and no longer has the option of surprise), the 88 takes a long shot downrange at them. It misses, but serves to remind the tankers that helping the infantry by drawing off fire from the German anti-tank guns is not without risk!

Along the highway in the middle of the table a “Patrol Contest” of sorts plays out. The Germans in the field get taken out by the American platoon in the farm to allow the placement of a patrol into the small woods. That move will be countered by a German patrol deployment at turn end to prevent the Yanks from moving up to the edge of the woods to deploy a unit there.
In the south both sides have deployed patrols – the Germans to the orchard between their two farm positions and the Americans in the streambed to the front of the 2nd Plt in the treeline. Both sides have been bloodied, but the Americans have suffered more and may be thinking of getting their reserve Company into action sooner than planned in order to keep the attack moving forward – though now rolling one less command die (because of the casualty-induced FUBAR) could make the effective use of a larger force problematic.
The situation at the end of the sixth turn:

The next turn sees the German order for the 1st Platoon to return to their position in the farm to meet the threat of the American tanks to be a mistake…
…as the men are caught in the middle of the field by the swiftly-advancing Shermans who inflict six hits, taking out one section and suppressing the rest.
The Germans manage to get in some of their own by revealing/deploying the second Flak battery on the north side of town. It inflicts two points of shock on one of the tank sections.
The field of fire for this unit is very limited and they are lucky to have had the Americans (perhaps concerned about possible Panzerschreck/faust attacks from the farm?) drive into one of the few places where they could be seen/engaged.
The Americans aren’t done, though, as the nearby Combat Patrol moves into the farm and a 57mm AT gun deploys into the position. It opens fire on the exposed German platoon, taking out another section.
The mandatory rout test is avoided by the use of a Company HQ order, and the remaining men scurry into the cover of the adjacent woods (that, in hindsight, they should have moved through in the first place?).

The Americans finish their attacks with both a Company and Battalion mortar strike on the IG18 position in the wood, but only manage to score a point of shock (which the Germans rally off at the end of the turn).
In their Phase, the newly-revealed German 88 (thinking that it will see little-to-no future opportunities) takes another shot at the same tank section, damaging it and leaving it suppressed. The return/react fire from the Americans is ineffective.
The only incident of note to occur in the south is the moving up of the 2nd tank platoon – They’re now adjacent to the Company B HQ, and a welcome sight to the put-upon 1st Platoon in the treeline ahead of them.
The American 3rd and German MG Platoons (which had withdrawn last turn) each took advantage of the momentary quiet to rally.

The suffering of their 1st Platoon has placed the German player a single unit’s loss away from a FUBAR, the attack has managed to reach halfway across the table on both flanks, and the single platoon left to deploy looks to be well short of ‘not enough’ to counter the full company the Americans hold in reserve. If adequate transport were available a withdrawal would be under consideration, but since such a move would be difficult to execute as well as abandon the heavy weapons (which can’t/won’t be replaced) the German player is committed to continuing the battle.
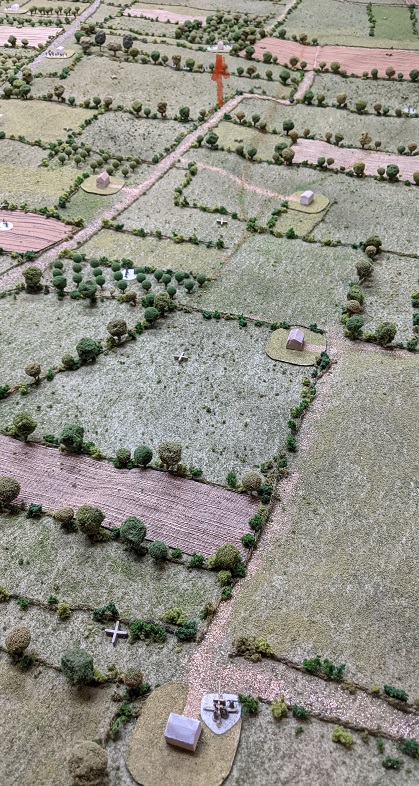
Situation at the end of turn 7:

It comes as no surprise that the next turns see a flurry of shooting on the north side of the battlefield as the 88 and IG18 on the German side exchange fire with the US tank platoon and AT gun. First to fire is the American 57mm, which puts a point of shock on the 88. The IG18 responds by firing on the AT gun position and inflicting a point of shock on the American crew.
The Americans are really getting tired of that pesky gun on the hill and again drop mortar barrages (both Company and Battalion) onto the position. The German is not as lucky with the saves as last time and the unit is KO’d.
The resultant Command Crisis sees the German HQ lose two orders…ugh!

The Tank Platoon then fires on the 88 but does no damage – unlike the response from the flak gun which destroys the previously-damaged tank section. On their turn the 88 gets serious and takes out the other section. (It took a Company HQ order to manage it, but well worth it! The American player helped by rolling a ‘3’ on the damage results table.) With things going their way, the Germans decide to deploy their last platoon into the much-fought-for farm and fire on the (now lonely) AT gun across the way – they were unable to take it out of the game, but it is suppressed.
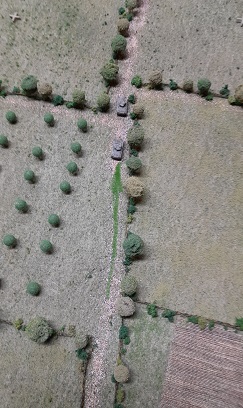
(NOTE: The little tanks are there to represent the KO’d 1st Platoon. They’re not great models, but are close to the 1/1000 ground scale and so give a better indication -imo- of the physical presence of the wrecks in the landscape when it comes to blocking movement and/or line of sight.)
The American 2nd Platoon of A Company -which hasn’t done anything much beyond occupy the farm on the highway- is called over to join the fight on the north side. It suffers a point of shock from opportunity fire by the Pak40 in the town outskirts down the road, but is now over where the action is.
Over on the south side there’s also a bit of gun v tank action but the results aren’t as dramatic. The German Pak40 and 88 put a point of shock each onto the 2nd tank platoon, which responds by giving the flak position its own pair with return fire.

The Company B CO orders the shot-up 1st and 3rd platoons to regroup back at HQ – they’ll be able to form a new, combined platoon at the end of the next turn.
Situation at the end of turn 8:

The next turn sees the German HQ ‘hesitant’ for the second time, so the Americans press the attack.
Taking that farm at the crossroads on the north side is the key to their plan, and they really pour it on in an attempt to eliminate the new German platoon there.
The combined fire from their 1st platoon in the farm, the Company mortars, the AT gun, and their last barrage from the Battalion mortars only manages to take out a single section, though.
Time for new dice, perhaps?

The US 2nd platoon hustles over and puts fire into the Germans in the farm as well, but doesn’t manage to cause any harm – that farm complex must be very sturdy!
The clock is ticking and the attack needs to get a move on – so the Americans call up the last (3rd) tank platoon to provide the punch that will (hopefully) drive the Germans out of their position.
As long as they stay out of the 88’s limited kill zone (the location of which is well marked by the hulks of the 1st platoon) these Shermans should be able to do the trick?

Over on the (relatively boring) south side, the 2nd tank platoon rallies from previous attacks and moves over to the road, from where it fires at the flak position on the distant hill. It inflicts a point of shock, but the return fire from the 88 suppresses the tankers again.
The Pak40 is unable to capitalize on the vulnerability of the suppressed Shermans: Its fire down into the valley fails to do any damage…but the American crews must still be questioning the wisdom of driving up what looks to be a ‘valley of death’?
The final action of the turn is the movement of the resquadded 1st and 3rd Platoons of Company B into the woods near the highway.
Situation at the end of turn 10:
The Germans win the initiative on the next turn and use the advantage to settle the (lopsided) gun duel on the north side as the 88 takes out the isolated 57.
The two surviving sections of the German 3rd Platoon in the (exposed, much-targeted) farm fail to rally, so the Adj pays a visit to bolster their resolve (there is, by now, a well-worn path from this farm to the HQ…) and decides to pull them back into the safety of the woods, where they join the beat up remains of the 1st Platoon.
The American Company A CO uses the opportunity to move the HQ and the rest of the men forward: The 1st Platoon leaves its comfortable digs in the farm to the mortar section, while the 3rd moves up through the orchard.
The combined 1st and 3rd Platoons of B Company move up to take over the duty of highway monitor.
Where’s the armor support? The 3rd tank platoon seems to be taking its time getting up to where the action is… (really poor dice rolls for movement – a trend with luck that seems to favor the Germans a lot?).

In the south the Tank v Gun fight continues with shots traded by both sides. The Germans come out ahead as the 88 and Pak40 combine to take out the lead Sherman section.
(While the deployment of the tanks on this flank has taken the heat off of the infantry, there seems to have been little gain made to justify the expense?)
The German player figures the 88 can handle the south side well enough on its own, and orders the AT crews to manhandle their guns back to help out the situation on the other side of the ridge. They don’t get very far up the hill, though -even with the help of some HQ staff!
More shuffling as the Germans move the 2nd Platoon back to the orchard to their rear. The Americans try to move in but are caught by alert and effective opportunity fire (read: really good dice rolls!) from the German MG section and are pinned in the field before they can reach cover.

That result confirms for the American player that it is the battle in the north that will decide the fate of the attack. Company B’s platoons are positioned to take on the German remnants in the woods, the tanks are (finally!) getting close enough to help, and the HQ is with the mortars in the farm.
Situation at the end of turn 12
The next turn begins poorly for the Americans as Flt.Lt.Mulligan* comes roaring over in his Typhoon above what he believes to be enemy territory and -seeing tanks on the road- decides to shoot them up a bit as he passes. The attack only inflicts one point of shock, but is a bad omen for the way things will go.

The Germans win the initiative, and use it to move the Pak40 (again: with help from some HQ staff…) to among the remains of the IG18 position and fire (but miss…for once!) into the flank of the Americans in the field. The 88 fires as well but only manages to inflict a point of shock.


The Germans join the “The North is the Key” club and move the 2nd Platoon out of the orchard while the MG keeps the Americans busy with some (for once ineffective) covering fire.
The Americans rally (with help from HQ) and move into the vacated farm. The Germans react by moving farther north (out of range).
The other activity in the south involves ineffective fire traded between the 88 and remaining section of the 2nd tank platoon, as well as the deployment (finally?) of the Company B mortar section into the treeline occupied by the 2nd Platoon.
The 3rd Tank Platoon recovers from the strafing run and moves up smartly. They’re careful to stay out of the 88’s LOS, but that also means that they can’t help counter its fire…
(The Germans are pleasantly amazed that the flak position is still in the game and playing a role in its progress.)

The American player decides to take out the annoying AT gun in the woods before it can be reinforced. The 2nd Platoon shifts over to allow it to fire with all sections but is caught by (ridiculously well-rolled – but by now not surprising!) opportunity fire which takes out a section and pins them before they can fire.
With luck seeming to be well on their side and the initiative in hand, the 88 joins with the Pak40 to take out two more sections of the poor 2nd Platoon (the dice are really dominating things…dunno if that’s good or…?) which then routs from the field.
Reaction fire from the Company mortars put two points of shock on the Pak40 position, but that’s small compensation for the loss of an entire platoon.

Just to spread the American bad luck evenly across the board, Mulligan returns -on the south side this time- to put a point of shock onto the remaining section of the 2nd tank platoon, which is now suppressed.
Piling on, the 88 on the south side sends the coup de grace downrange, taking out the section. (The US player rolled another ‘3’ on the results table – that’s two for the game…time for new dice now?)
The Americans are now three KIA results away from a fourth FUBAR = defeat*.

– – – – – – – – – – – – – – – – – – – – – – – –
*wroops! a later reading of the rules (during the second game) informs me that reaching three FUBARs signals defeat (unless a large Battalion), soo…the game should have ended when the US platoon was routed in the previous turn (with subsequent impact on the withdrawal/opinion rolls). oh well…not gonna redo it even though doing so would most likely result in fewer American units withdrawing and definitely set Col.Goode’s outlook down a notch (based on the roll made)…onward an upward!
– – – – – – – – – – – – – – – – – – – – – – – – –
Make that two more KIAs (and a search for a hammer to use on the dice…) as the 3rd Tank Platoon -which got just a little too close to the infantry in the woods- gets ambushed by a Panzerschreck team and rolls its own ‘3’ for a result, so…bye bye lead section.
The surviving section moves out of range of the infantry and sets up to join the Company mortar in firing on (and missing…because dice) the Pak40 position. The Americans still hope to bring decisive odds to an assault on the Germans in the woods, and move up the 1st Platoon, while the German 2nd hustles up the hill to support the defense.
Situation at the end of turn 14:
In case you wondered, the forces left on the south side (US Company B vs German 88 and MG) have been and continue trading fire, but neither side manages to score any kills.


The dice continue to favor the Germans as their hilltop position suffers a lot of fire but manages (with help from HQ) to survive.
The final straw in the American’s bad luck comes when the 3rd Platoon gets caught by (the by-now-expected-to-be-successful) opportunity fire and ends up pinned in the middle of the field on their way to join the 1st Platoon.
With the prospect of achieving overwhelming force in an assault on the woods dimming, the Americans decide to call it quits. Their third Company is still in hand, but it’s decided that by the time they get up to do any good the Germans may very well score the two KIA results needed to force a defeat -which would influence the reaction of Col.Goode as well as modify the results of the withdrawal of surviving units. So, a withdrawal is ordered.
However it may be appreciated, the withdrawal/casualty rolls favor the Americans (would have been nice to see some of that during the game…) and when the dust settles and heads are counted they find that only two rifle, a Bazooka, and an MG section have been lost for the campaign, so the Battalion will be close to full strength should they be needed later in the day.
Situation at game end:
Wrap up / evaluation: Lots of questions/issues left unresolved, and lots (and lots!) of mistakes made and/or revealed, but…since the focus of the campaign = learn/test the rules, experiment with minis (practicality of scale), and avoid reality….I’m putting this one in the can and moving on to another.
— return to campaign main page —
- re: ‘Hesitant’ Company HQs that result from the Battalion dice roll at the start of a turn.
An increase in the Fog of War facet of the game can be easily obtained, imo, by keeping each player’s rolls secret so that effects such as this do not become known by the other player. In this case (during the first turn, but it occurs throughout the game) there should be no reason for the American player to act with the knowledge that the German can make no (or limited) reply, and withholding that intelligence from them by hiding the Battalion dice roll seems a simple way to accomplish it. ↩︎ - re: American fire on farm objective
This is the first (of what seemed like many?) instance where the dice roll created a major event in the progress of the game/battle. iirc, 21 dice were rolled in the American attacks on the farm and the German platoon there took only two shock. Had an average number of hits been scored (~10) and the saves also resulted in an average impact (5 shock?) the Germans would have taken a casualty and been suppressed. Had the dice leaned as far the other way (90% success instead of 10% for the initial attack rolls) they would have likely been eliminated on that turn, which would have resulted in a completely different game. As frustrating as it may be to be the player on the ‘wrong’ side of such an outcome, I find it an attractive facet of the ‘narrative building’ facet of the process. ↩︎
